介绍
Uniapp是 DCloud公司于2012年开始研发的能够一次代码开发,生成H5、小程序(微信、支付宝、百度、华为等)、APP等应用的技术的统称,开发工具是HBuilderX,功能非常强大,由此引申出许多技术社区与生态环境。
引言
Uniapp开发移动端上传,需要前端、后台接口的配合,是比较常见和通用的需求场景,包括许多细节的实现,如:前端上传页面ui,选择文件(图片或视频等),选择时上传文件大小的判断、上传状态的设定,上传后调用后台服务器上传接口上传到服务器,上传成功后回传参数处理等。还有些页面包括要上传多个图片、多个视频,混合搭配,如果没有好的代码封装,往往使得代码不易读、维护很困难。Uniapp提供的前端封装、以及我们使用相应后端接口,搭配好,可以形成一套比较简洁通用的实现方式。笔者根据以往经验进行总结如下。
实例
本文使用Uniapp开发(使用uview ui组件技术)前端微信小程序,后端接口采用TP6,实现移动端上传的功能
需求场景
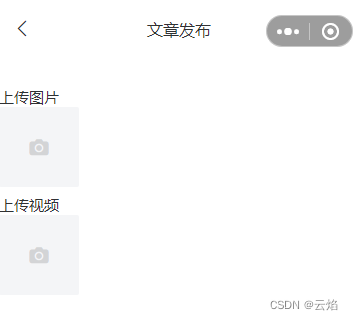
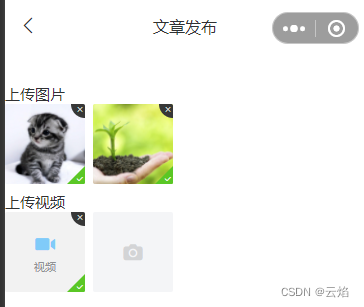
发布内容管理资讯,包含上传图片、上传视频的表单,提交文件上传到服务器。
实现
前端页面

前端页面代码
<template>
<view>
	<u-navbar :autoBack="true" title="文章发布" title-width="500"></u-navbar>
	<view class="top_box"></view>
	<u--text text="上传图片"></u--text>
	<u-upload :fileList="fileList1" @afterRead="afterRead" @delete="deletePic" @oversize="oversize"
			name="1" multiple :maxCount="2" :previewFullImage="true" maxSize="5024000"
		></u-upload>
	<u--text text="上传视频"></u--text>
	<u-upload :fileList="fileList2" @afterRead="afterRead" @delete="deletePic" @oversize="oversize"
			name="2" multiple :maxCount="2" accept="video" :previewFullImage="true" maxSize="10240000"
		></u-upload>
</view>
</template>
export default {
	data() {
		return {
			...
			fileList1: [], fileList2: [],
		}
	},
...
	methods:{
		...
		// 删除图片
		deletePic(event) {
			this[`fileList${event.name}`].splice(event.index, 1)
		},
		// 新增图片
		async afterRead(event) {
			// 当设置 mutiple 为 true 时, file 为数组格式,否则为对象格式
			console.log("afterRead.event=",event);
			let lists = [].concat(event.file)
			let fileListLen = this[`fileList${event.name}`].length
			lists.map((item) => {
				this[`fileList${event.name}`].push({
					...item, status: 'uploading', message: '上传中'
				})
			})
			for (let i = 0; i < lists.length; i++) {
				const result = await this.uploadFilePromise(lists[i].url);
				console.log("afterRead.result=",result);
				let item = this[`fileList${event.name}`][fileListLen]
				this[`fileList${event.name}`].splice(fileListLen, 1, Object.assign(item, {
					status: 'success',
					message: '',
					url: result,

				}))
				fileListLen++
			}
			//fileList1['url']保存了上传的图片保存路径
		},
//上传限制
		oversize(event){
			console.log("oversize.event=",event);
			if(event.name=='1'){ uni.$u.toast("上传图片最大不能超过5M" ) ; }
			if(event.name=='2'){ uni.$u.toast("上传视频最大不能超过10M" ) ; }
		},

		uploadFilePromise(url) {
			let _self=this;
			return new Promise((resolve, reject) => {
				let a = uni.uploadFile({
					url: this.apiUrl+'/api/upload/uploadFile', // 仅为示例,非真实的接口地址
					header:{authorization:_self.auth_token},
					filePath: url, name: 'file',
					// formData: {	user: 'test' },
					success: (res) => {
						console.log("uploadFilePromise.success.res=",res);
						let jsonData=JSON.parse(res.data);//res.data.data
						let result=jsonData.data.photo;
						setTimeout(() => {
							resolve(result)
						}, 1000) ;
					}
				});
			  // console.log("uploadFilePromise.a=",a);
			})
		},
	}

}
</script>
其中,deletePic(删除)、afterRead(读取后处理)、oversize(上传限制)、都是通用函数,使用事件参数event判断不同控件,实现了图片、视频这2个字段域的上传处理。uploadFilePromise(上传处理)函数也是通用调用后台接口实现的,其中参数header中包含认证token传递给后端,约定上传前必须用户先登录,获得认证token后作为上传参数传递给接口,用于判断是谁上传文件,防止不法分子上传服务器占用资源。起到一定安全作用。
后台接口实现
接口路径:/api/upload/uploadFile
实现代码
class Upload extends BaseApi{
    public function uploadFile(Request $request){
        date_default_timezone_set("Asia/Shanghai"); //设置时区
        $token=$request->header('authorization');//$request->param('token');
        $jwt=new JwtService();
        $deDatas=$jwt->decodeToken($token,Config::get('app.jwt_scene_apiLogin'));
        $uid=null;
       try {
        if($deDatas['code']==parent::SUCCESS_CODE){
            $deData= $deDatas['data'];
            $uid=$deData['user']['id'];
            if(empty($uid)){
                return json_response(-1, "登录用户无效.");
            }
        }else{
            return json_response($deDatas['code'], $deDatas['msg']);
        }
        $code = $_FILES['file'];//获取小程序传来的图片
        if(is_uploaded_file($_FILES['file']['tmp_name'])) {
            //把文件转存到你希望的目录(不要使用copy函数)
            $uploaded_file=$_FILES['file']['tmp_name'];
            //我们给每个用户动态的创建一个文件夹
            $uppath_pos_pre=app()->getRootPath().'/Data/UploadFiles';//Config::get('app.uppath_pos_pre')
            $user_path=$uppath_pos_pre.'/users/uid-'.$uid;//$_SERVER['DOCUMENT_ROOT']."/m_pro/".$username;
            //判断该用户文件夹是否已经有这个文件夹
            if(!file_exists($user_path)) {
                //mkdir($user_path);
                mkdir($user_path,0777,true);
            }
            $file_true_name=$_FILES['file']['name'];
            $fileName=date("Ymd")."-".time().rand(1,1000).substr($file_true_name,strrpos($file_true_name,"."));
            $move_to_file=$user_path."/".$fileName;//strrops($file_true,".")查找“.”在字符串中最后一次出现的位置
            $savaPath='users/uid-'.$uid."/".$fileName;
            //echo "$uploaded_file   $move_to_file"; iconv("utf-8","gb2312",$move_to_file)
            if(move_uploaded_file($uploaded_file,$move_to_file)) {
//               return $_FILES['file']['name']."--上传成功".date("Y-m-d H:i:sa");
                $datas=['photo'=>$savaPath];
                return json_response(parent::SUCCESS_CODE, 'success',$datas);//上传成功
            } else {
//               return "上传失败".date("Y-m-d H:i:sa");
                return json_response(-3, "上传失败1" );
            }
        } else {
            return json_response(-9, "上传失败2" );//"上传失败".date("Y-m-d H:i:sa");
        }
       } catch (Exception $e) {
log_prepend("uploadFile.Exception==".serialize($e),'debug_api_Upload.txt');
           return json_response($e->getCode(), $e->getMessage());
       }
    }

}
运行后的效果

版权声明:本文为yan_dk原创文章,遵循 CC 4.0 BY-SA 版权协议,转载请附上原文出处链接和本声明。