目录
1.介绍
Intent 是一个消息传递对象,可以用来从其他应用组件请求操作。其中主要有三种,1.启动Activity;2.启动服务;3.传递广播。Intent有显示和隐示之分。
2.Intent启动服务
2.1启动 Activity
Activity 表示应用中的一个屏幕。通过将 Intent 传递给 startActivity(),您可以启动新的 Activity 实例。Intent 用于描述要启动的 Activity,并携带任何必要的数据。
如果您希望在 Activity 完成后收到结果,请调用 startActivityForResult()。在 Activity 的 onActivityResult() 回调中,您的 Activity 将结果作为单独的 Intent 对象接收。
2.2启动服务
Service 是一个不使用用户界面而在后台执行操作的组件。使用 Android 5.0(API 级别 21)及更高版本,您可以启动包含 JobScheduler 的服务。
对于 Android 5.0(API 级别 21)之前的版本,您可以使用 Service 类的方法来启动服务。通过将 Intent 传递给 startService(),您可以启动服务执行一次性操作(例如,下载文件)。Intent 用于描述要启动的服务,并携带任何必要的数据。
如果服务旨在使用客户端-服务器接口,则通过将 Intent 传递给 bindService(),您可以从其他组件绑定到此服务。
2.3传递广播
广播是任何应用均可接收的消息。系统将针对系统事件(例如:系统启动或设备开始充电时)传递各种广播。通过将 Intent 传递给 sendBroadcast() 或 sendOrderedBroadcast(),您可以将广播传递给其他应用。
也可以配合下面的图来进一步看,也会在后面用代码的形式来讲解各个部分,其中隐示intent常用的实例也会用代码的演示。
3.Intent类型
3.1显示
通过提供目标应用的软件包名称或完全限定的组件类名来指定可处理 Intent 的应用。通常,您会在自己的应用中使用显式 Intent 来启动组件,这是因为您知道要启动的 Activity 或服务的类名。例如,您可能会启动您应用内的新 Activity 以响应用户操作,或者启动服务以在后台下载文件。
3.2隐示
不会指定特定的组件,而是声明要执行的常规操作,从而允许其他应用中的组件来处理。例如,如需在地图上向用户显示位置,则可以使用隐式 Intent,请求另一具有此功能的应用在地图上显示指定的位置。
4.数据的传递
4.1向下传递
当启动activity的时候把数据传递下去、
4.2返回传递被启动的数据
启动activity后,返回原activity的时候把数据传递回来。

5举例说明
5.1显示

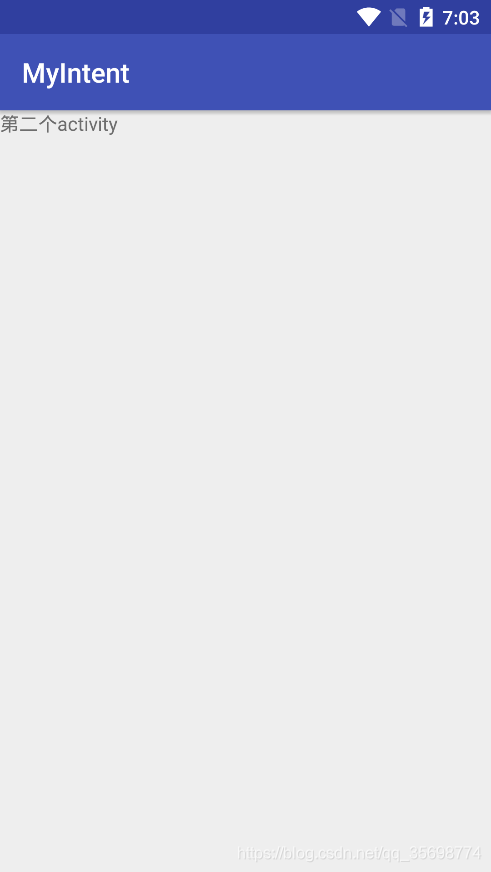
如上如所示 点击显示启动,启动第二个activity,跳转到第二个activity界面。代码如下:
5.1.1清单文件:
<activity android:name=".Main2Activity" />5.1.2点击步骤:
case R.id.button_1:
    intent = new Intent(this, Main2Activity.class);
    startActivity(intent);
    break;
5.1.3 MainActivity xml:
<Button
    android:id="@+id/button_1"
    android:onClick="onClick"
    android:layout_width="wrap_content"
    android:layout_height="wrap_content"
    android:text="显示启动" />
5.1.4 Main2Activity xml:
<?xml version="1.0" encoding="utf-8"?>
<android.support.constraint.ConstraintLayout xmlns:android="http://schemas.android.com/apk/res/android"
    xmlns:app="http://schemas.android.com/apk/res-auto"
    xmlns:tools="http://schemas.android.com/tools"
    android:layout_width="match_parent"
    android:layout_height="match_parent"
    tools:context="com.example.administrator.myintent.Main2Activity">

    <TextView
        android:layout_width="wrap_content"
        android:layout_height="wrap_content"
        android:text="第二个activity" />

</android.support.constraint.ConstraintLayout>
显示的开启activity就很明确了Intent intent = new Intent(this, Main2Activity.class);“this”代指上下文。“Main2Activity.class” ,代指要跳转的activity,最后通过startActivity(intent);来完成启动。
5.2隐示

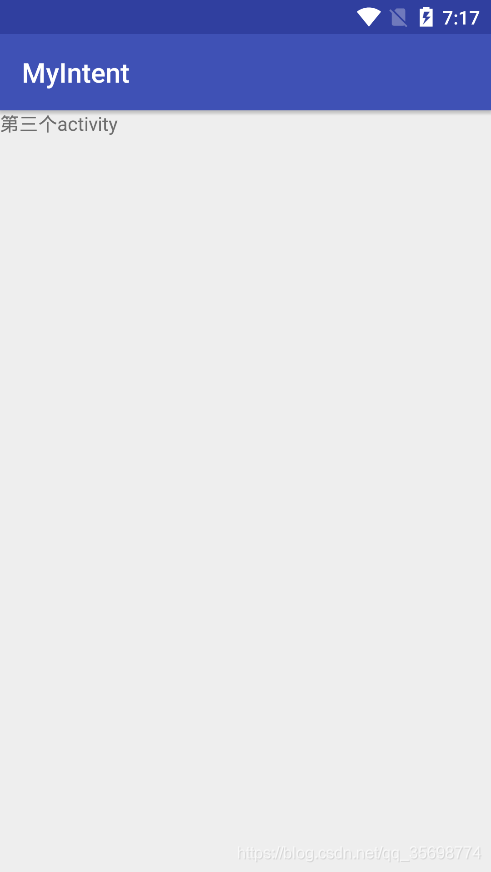
由上图可以看出点击“隐示启动” 启动隐示activity,代码如下:
5.2.1 清单文件:
<activity android:name=".Main3Activity">
    <intent-filter>
        <action android:name="com.example.administrator.myintent.ACTION_START"/>
        <category android:name="android.intent.category.DEFAULT"/>
    </intent-filter>
</activity>
5.2.2 点击步骤:
case R.id.button_2:
     intent = new Intent("com.example.administrator.myintent.ACTION_START");
    startActivity(intent);
    break;
5.2.3 MainActivity xml:
<Button
    android:id="@+id/button_2"
    android:onClick="onClick"
    android:layout_width="wrap_content"
    android:layout_height="wrap_content"
    android:text="隐示启动" />
5.2.4 Main3Activity xml:
<?xml version="1.0" encoding="utf-8"?>
<android.support.constraint.ConstraintLayout xmlns:android="http://schemas.android.com/apk/res/android"
    xmlns:app="http://schemas.android.com/apk/res-auto"
    xmlns:tools="http://schemas.android.com/tools"
    android:layout_width="match_parent"
    android:layout_height="match_parent"
    tools:context="com.example.administrator.myintent.Main3Activity">
    <TextView
        android:layout_width="wrap_content"
        android:layout_height="wrap_content"
        android:text="第三个activity" />
</android.support.constraint.ConstraintLayout>
可以看出与显示不同的是首先清单文件中多了:intent-filter 标签,里面包含 action 和 category 标签。然后Intent intent = new Intent(“com.example.administrator.myintent.ACTION_START”);里面直接是写的intent-filter 标签对应的activon标签的值。
action : 标签指明了当前活动可以相应com.example.administrator.myintent.ACTION_START action,当然这个action是我自己定义的.
category :标签包含了一个附件信息,更精确的指明了能够响应的intent中还可能带有category
只有 action和category标签对应的内容能够完全匹配的时候才能启动对应的activity也就是说正确写法是:
case R.id.button_2:
    intent = new Intent("com.example.administrator.myintent.ACTION_START");
    intent.addCategory("android.intent.category.DEFAULT");
    startActivity(intent);
    break;
但是以上并没有写intent.addCategory(“android.intent.category.DEFAULT”);也完成了启动,那因为android.intent.category.DEFAULT是一种默认的category在调用startActivity(intent);时会默认加上。action是只有一个,但是category是可以添加多个的,
这时我们加上 category :
case R.id.button_2:
    intent = new Intent("com.example.administrator.myintent.ACTION_START");
    intent.addCategory("android.intent.category.MYDEFAULT");
    startActivity(intent);
    break;
结果程序崩溃了:
Caused by: android.content.ActivityNotFoundException: No Activity found to handle Intent { act=com.example.administrator.myintent.ACTION_START cat=[com.example.administrator.myintent.DEFAULT] }
报错了,找不到默认的DEFAULT。将清单文件修改一下:
<activity android:name=".Main3Activity">
    <intent-filter>
        <action android:name="com.example.administrator.myintent.ACTION_START"/>
        <category android:name="android.intent.category.DEFAULT"/>
        <category android:name="com.example.administrator.myintent.DEFAULT"/>
    </intent-filter>
</activity>
现在就可以顺利运行了。
5.3向下传递数据
我们通过显示的方式传递数据,主要展示传递普通类型和对象,
case R.id.button_3:
    Persion persion = new Persion("小明",3);
    intent = new Intent(this, Main4Activity.class);
    intent.putExtra("key", "你好Main4Activity,我是MainActivity");
    intent.putExtra("key1",persion);
    startActivity(intent);
    break;
intent.putExtra(“key”, “你好Main4Activity,我是MainActivity”); 传递的是一个string类型的数据 “key”-> key,”你好Main4Activity,我是MainActivity” ->value;
intent.putExtra(“key1″,persion); 传递一个对象,”key1” ->key ,persion ->value persion 需要序列化
public class Persion implements Serializable{


    private static final long serialVersionUID = -8896114401201616465L;
    private String name;
    private int aget;

    public Persion(String name, int aget) {
        this.name = name;
        this.aget = aget;
    }

    public String getName() {
        return name;
    }

    public void setName(String name) {
        this.name = name;
    }

    public int getAget() {
        return aget;
    }

    public void setAget(int aget) {
        this.aget = aget;
    }
}
接收:
public class Main4Activity extends AppCompatActivity {

    @Override
    protected void onCreate(Bundle savedInstanceState) {
        super.onCreate(savedInstanceState);
        setContentView(R.layout.activity_main4);
        TextView tv = findViewById(R.id.tv);
        TextView tv1 = findViewById(R.id.tv1);
        String stringExtra = getIntent().getStringExtra("key");
        Persion persion = (Persion) getIntent().getSerializableExtra("key1");
        tv.setText(stringExtra);
        tv1.setText("name:"+persion.getName()+"   age:"+persion.getAget());
    }
}
String stringExtra = getIntent().getStringExtra(“key”);接收的是string的数据,Persion persion = (Persion) getIntent().getSerializableExtra(“key1”);接收的是对象。
Main4Activity xml:
<?xml version="1.0" encoding="utf-8"?>
<LinearLayout xmlns:android="http://schemas.android.com/apk/res/android"
    xmlns:app="http://schemas.android.com/apk/res-auto"
    xmlns:tools="http://schemas.android.com/tools"
    android:layout_width="match_parent"
    android:layout_height="match_parent"
    android:orientation="vertical"
    tools:context="com.example.administrator.myintent.Main4Activity">

    <TextView
        android:layout_width="wrap_content"
        android:layout_height="wrap_content"
        android:text="第三个activity" />

    <TextView
        android:id="@+id/tv"
        android:layout_width="wrap_content"
        android:layout_height="wrap_content" />
    <TextView
        android:id="@+id/tv1"
        android:layout_width="wrap_content"
        android:layout_height="wrap_content" />

</LinearLayout>
5.4向上传递数据


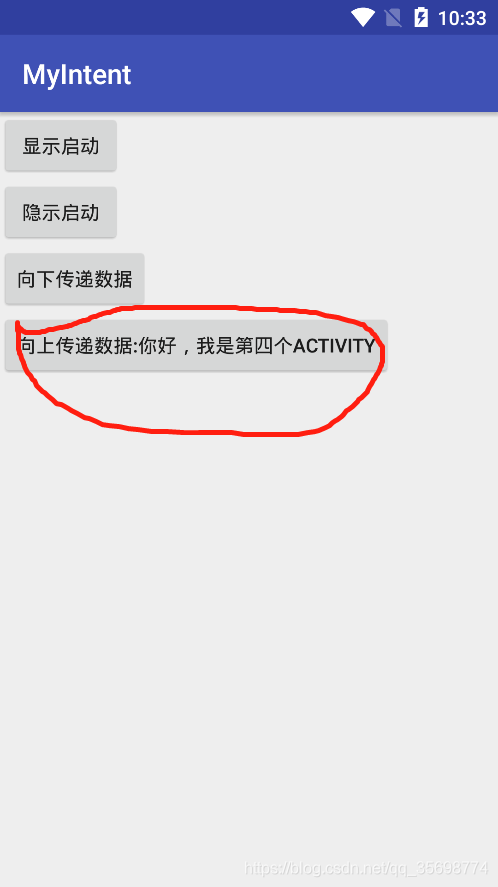
以上三个图是通过跳转到下一个activity,然后通过点击一个自己定义的返回按钮返回,然后更新返回带回来的内容,具体如下:
1.MainActivity
1.1启动Main5Activity.class
public static final int CODE = 10;
case R.id.button_4:
    button_4 = findViewById(R.id.button_4);
    intent = new Intent(this, Main5Activity.class);
    startActivityForResult(intent, CODE);
    break;
1.2重写onActivityResult(方法)
@Override
protected void onActivityResult(int requestCode, int resultCode, Intent data) {
    super.onActivityResult(requestCode, resultCode, data);
    switch (requestCode) {
        case CODE:
            if (resultCode == RESULT_OK) {
                String key = data.getStringExtra("key");
                button_4.setText("向上传递数据:" + key);
            }
            break;
        default:
    }
}
1.3 MainActivity的xml
<Button
    android:id="@+id/button_4"
    android:onClick="onClick"
    android:layout_width="wrap_content"
    android:layout_height="wrap_content"
    android:text="向上传递数据" />
2. Main5Activity.class
public class Main5Activity extends AppCompatActivity {


    @Override
    protected void onCreate(Bundle savedInstanceState) {
        super.onCreate(savedInstanceState);
        setContentView(R.layout.activity_main5);
        Button buttonReturn = findViewById(R.id.button_return);
        buttonReturn.setOnClickListener(new View.OnClickListener() {
            @Override
            public void onClick(View v) {
                Intent intent = new Intent();
                intent.putExtra("key", "你好,我是第四个Activity");
                setResult(RESULT_OK, intent);
                finish();
            }
        });

    }
}
在setResult(RESULT_OK, intent);中有两个参数setResult(int resultCode, Intent data)
resultCode:用于向上一个活动返回处理结果 一般是 RESULT_OK、RESULT_CANCELED、RESULT_FIRST_USER等
data:需要传递回去的数据
2.1 Main5Activity 的 xml 文件
<?xml version="1.0" encoding="utf-8"?>
<LinearLayout xmlns:android="http://schemas.android.com/apk/res/android"
    xmlns:app="http://schemas.android.com/apk/res-auto"
    xmlns:tools="http://schemas.android.com/tools"
    android:layout_width="match_parent"
    android:layout_height="match_parent"
    android:orientation="vertical"
    tools:context="com.example.administrator.myintent.Main5Activity">

    <TextView
        android:layout_width="wrap_content"
        android:layout_height="wrap_content"
        android:text="第四个activity" />

    <Button
        android:id="@+id/button_return"
        android:layout_width="wrap_content"
        android:layout_height="wrap_content"
        android:text="返回" />
</LinearLayout>
2.2 Main5Activity的清单文件
<activity android:name=".Main5Activity"></activity>
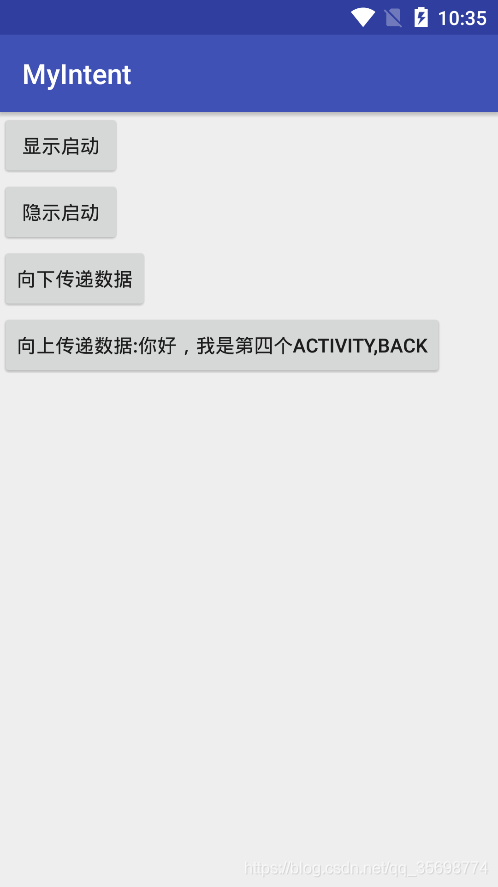
如果想点击返回,带回数据的话,我是通过重写onBackPressed()方法来做的,如下:
@Override
public void onBackPressed() {
    Intent intent = new Intent();
    intent.putExtra("key", "你好,我是第四个Activity,back");
    setResult(RESULT_OK, intent);
    finish();
}
其实只要是执行过
Intent intent = new Intent();
intent.putExtra("key", "你好,我是第四个Activity,back");
setResult(RESULT_OK, intent);
这些代码,点击返回就可以完成。
在onActivityResult(int requestCode, int resultCode, Intent data)中有三个参数,
requestCode:启动活动时传入的请求码 也就是CODE ,自己定义值
resultCode:返回数据时的处理结果 RESULT_OK 是系统自己的值,也可以自己定义,
data:返回的数据
5.5小应用
5.5.1闹钟

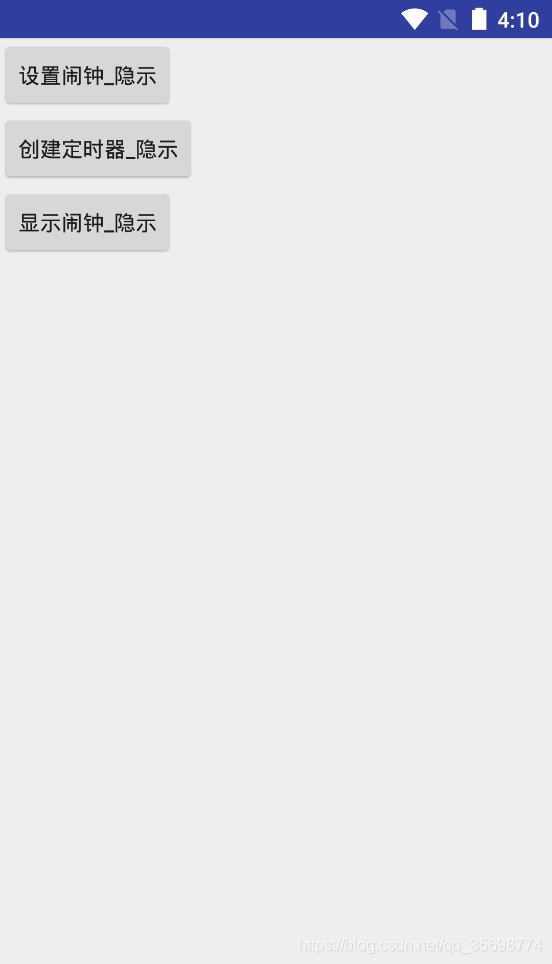
如图所示首先添加了一个闹钟选项。具体代码如下:
在MainActivity中的:
case R.id.button_5:
    intent = new Intent(this, Main6Activity.class);
    startActivity(intent);
    break;
在MainActivity xml:
<Button
    android:id="@+id/button_5"
    android:onClick="onClick"
    android:layout_width="wrap_content"
    android:layout_height="wrap_content"
    android:text="闹钟" />
一定要注意权限:
<uses-permission android:name="com.android.alarm.permission.SET_ALARM" />
5.5.1.1设置闹钟
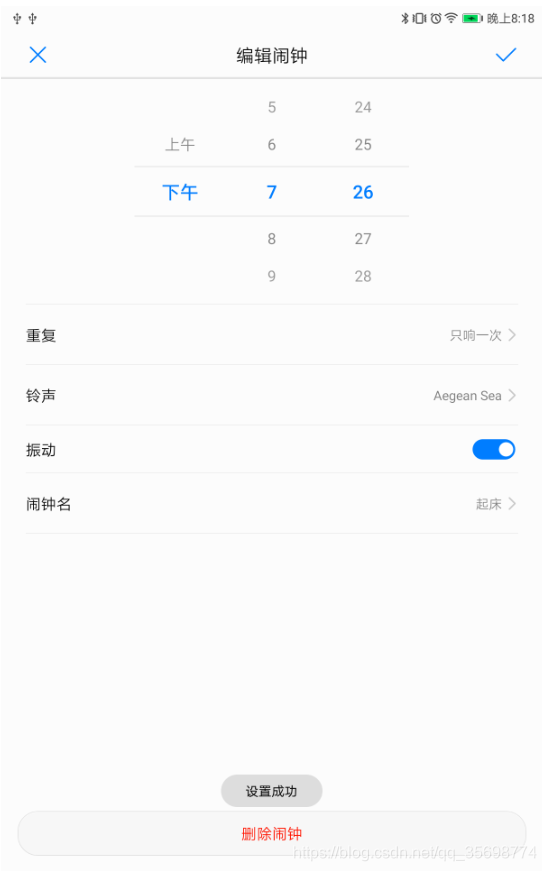
Intent intent = new Intent(AlarmClock.ACTION_SET_ALARM)
        .putExtra(AlarmClock.EXTRA_MESSAGE, message)
        .putExtra(AlarmClock.EXTRA_HOUR, hour)
        .putExtra(AlarmClock.EXTRA_MINUTES, minutes);
过滤器:
 <intent-filter>
        <action android:name="android.intent.action.SET_ALARM" />
        <category android:name="android.intent.category.DEFAULT" />
    </intent-filter>
完整代码:
case R.id.button_1:
    createAlarm("起床", 19, 26);
    break;
/**
* EXTRA_HOUR 闹铃的小时。
* EXTRA_MINUTES 闹铃的分钟。
* EXTRA_MESSAGE 用于标识闹铃的自定义消息。
* EXTRA_DAYS 一个 ArrayList,其中包括应重复触发该闹铃的每个工作日。每一天都必须使用 Calendar 类中的某个整型值(如 MONDAY)进行声明。 对于一次性闹铃,无需指定此 extra。
* EXTRA_RINGTONE 一个 content: URI,用于指定闹铃使用的铃声,也可指定 VALUE_RINGTONE_SILENT 以不使用铃声。 如需使用默认铃声,则无需指定此 extra。
* EXTRA_VIBRATE 一个布尔型值,用于指定该闹铃触发时是否振动。
* EXTRA_SKIP_UI 一个布尔型值,用于指定响应闹铃的应用在设置闹铃时是否应跳过其 UI。若为 true,则应用应跳过任何确认 UI,直接设置指定的闹铃。
*
* @param message 用于标识闹铃的自定义消息。
* @param hour 闹铃的小时
* @param minutes 闹铃的分钟。
*/
public void createAlarm(String message, int hour, int minutes) {
Intent intent = new Intent(AlarmClock.ACTION_SET_ALARM)
.putExtra(AlarmClock.EXTRA_MESSAGE, message)
.putExtra(AlarmClock.EXTRA_HOUR, hour)
.putExtra(AlarmClock.EXTRA_MINUTES, minutes);
if (intent.resolveActivity(getPackageManager()) != null) {
startActivity(intent);
Toast.makeText(this, "设置成功", Toast.LENGTH_SHORT).show();
} else {
Toast.makeText(this, "设置失败", Toast.LENGTH_SHORT).show();
}
}
xml:
<Button
    android:id="@+id/button_1"
    android:layout_width="wrap_content"
    android:layout_height="wrap_content"
    android:onClick="onClick"
    android:text="设置闹钟_隐示" />
5.5.1.2创建定时器
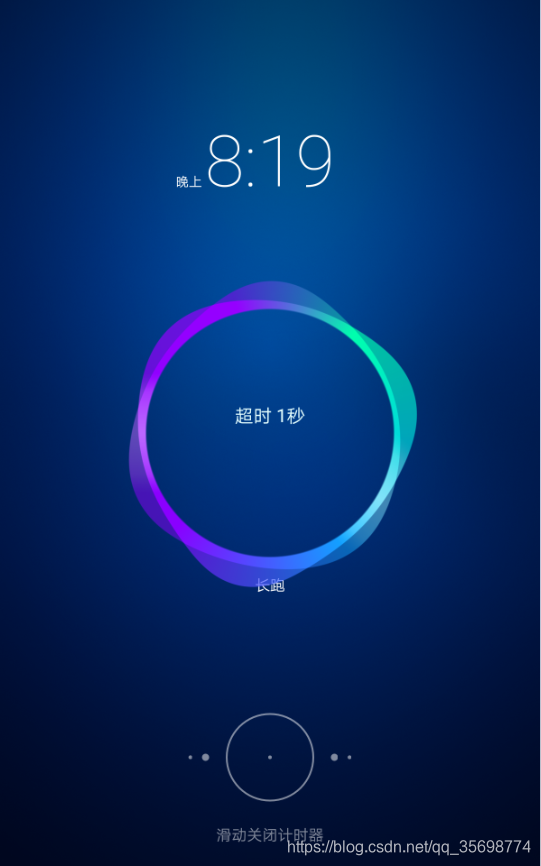
Intent intent = new Intent(AlarmClock.ACTION_SET_TIMER)
        .putExtra(AlarmClock.EXTRA_MESSAGE, message)
        .putExtra(AlarmClock.EXTRA_LENGTH, seconds)
        .putExtra(AlarmClock.EXTRA_SKIP_UI, true);
过滤器:
<intent-filter>
        <action android:name="android.intent.action.SET_TIMER" />
        <category android:name="android.intent.category.DEFAULT" />
    </intent-filter>
具体代码:
case R.id.button_2:
    startTimer("长跑", 5);
    break;
/**
* EXTRA_LENGTH 以秒为单位的定时器定时长度。
* EXTRA_MESSAGE 用于标识定时器的自定义消息。
* EXTRA_SKIP_UI 一个布尔型值,用于指定响应定时器的应用在设置定时器时是否应跳过其 UI。若为 true,则应用应跳过任何确认 UI,直接启动指定的定时器。
*
* @param message 用于标识定时器的自定义消息
* @param seconds 以秒为单位的定时器定时长度
*/
public void startTimer(String message, int seconds) {
Intent intent = new Intent(AlarmClock.ACTION_SET_TIMER)
.putExtra(AlarmClock.EXTRA_MESSAGE, message)
.putExtra(AlarmClock.EXTRA_LENGTH, seconds)
.putExtra(AlarmClock.EXTRA_SKIP_UI, true);
if (intent.resolveActivity(getPackageManager()) != null) {
startActivity(intent);
Toast.makeText(this, "设置成功", Toast.LENGTH_SHORT).show();
} else {
Toast.makeText(this, "设置失败", Toast.LENGTH_SHORT).show();
}
}xml:
<Button
    android:id="@+id/button_2"
    android:layout_width="wrap_content"
    android:layout_height="wrap_content"
    android:onClick="onClick"
    android:text="创建定时器_隐示" />
5.5.1.3显示闹钟列表

Intent intent = new Intent(AlarmClock.ACTION_SHOW_ALARMS);过滤器:
 <intent-filter>
        <action android:name="android.intent.action.SHOW_ALARMS" />
        <category android:name="android.intent.category.DEFAULT" />
    </intent-filter>
具体代码:
case R.id.button_3:
    startAlarmList();
    break;
/**
 * 开启列表 闹钟
 */
public void startAlarmList() {
    Intent intent = new Intent(AlarmClock.ACTION_SHOW_ALARMS);
    if (intent.resolveActivity(getPackageManager()) != null) {
        startActivity(intent);
        Toast.makeText(this, "设置成功", Toast.LENGTH_SHORT).show();
    } else {
        Toast.makeText(this, "设置失败", Toast.LENGTH_SHORT).show();
    }
}
xml:
<Button
    android:id="@+id/button_3"
    android:layout_width="wrap_content"
    android:layout_height="wrap_content"
    android:onClick="onClick"
    android:text="显示闹钟_隐示" />
5.5.2 日历

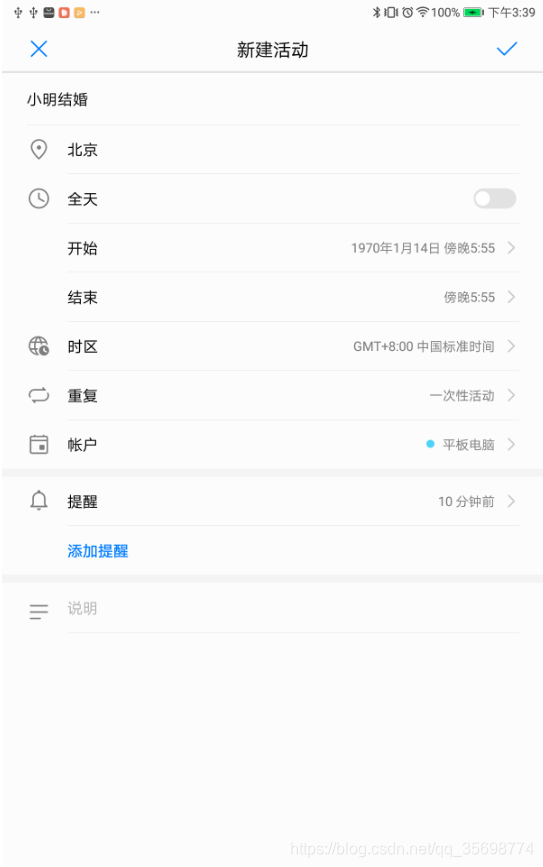
设置日历具体代码如下:
Intent intent = new Intent(Intent.ACTION_INSERT)
        .setData(CalendarContract.Events.CONTENT_URI)
过滤器:
Intent intent = new Intent(Intent.ACTION_INSERT)
        .setData(CalendarContract.Events.CONTENT_URI)
完成代码:
MainActivity:case R.id.button_6:
addEvent("小明结婚", "北京", 1158944160, 1158944163);
break;/**
* EXTRA_EVENT_ALL_DAY 一个布尔型值,指定此事件是否为全天事件。
* EXTRA_EVENT_BEGIN_TIME 事件的开始时间(从新纪年开始计算的毫秒数)。
* EXTRA_EVENT_END_TIME 事件的结束时间(从新纪年开始计算的毫秒数)。
* TITLE 事件标题。
* DESCRIPTION 事件说明。
* EVENT_LOCATION 事件地点。
* EXTRA_EMAIL
*
* @param title 事件标题
* @param location 事件地点
* @param begin 事件的开始时间(从新纪年开始计算的毫秒数)
* @param end 事件的结束时间(从新纪年开始计算的毫秒数)
*/
public void addEvent(String title, String location, long begin, long end) {
Intent intent = new Intent(Intent.ACTION_INSERT)
.setData(CalendarContract.Events.CONTENT_URI)
.putExtra(CalendarContract.Events.TITLE, title)
.putExtra(CalendarContract.Events.EVENT_LOCATION, location)
.putExtra(CalendarContract.EXTRA_EVENT_BEGIN_TIME, begin)
.putExtra(CalendarContract.EXTRA_EVENT_END_TIME, end);
if (intent.resolveActivity(getPackageManager()) != null) {
startActivity(intent);
}
}MainActivity xml:
<Button
    android:id="@+id/button_6"
    android:layout_width="wrap_content"
    android:layout_height="wrap_content"
    android:onClick="onClick"
    android:text="日历_隐示" />
5.5.3 相机


点击相机跳转到如图中的功能,
5.5.2.1 拍摄照片或者视频并将其返回


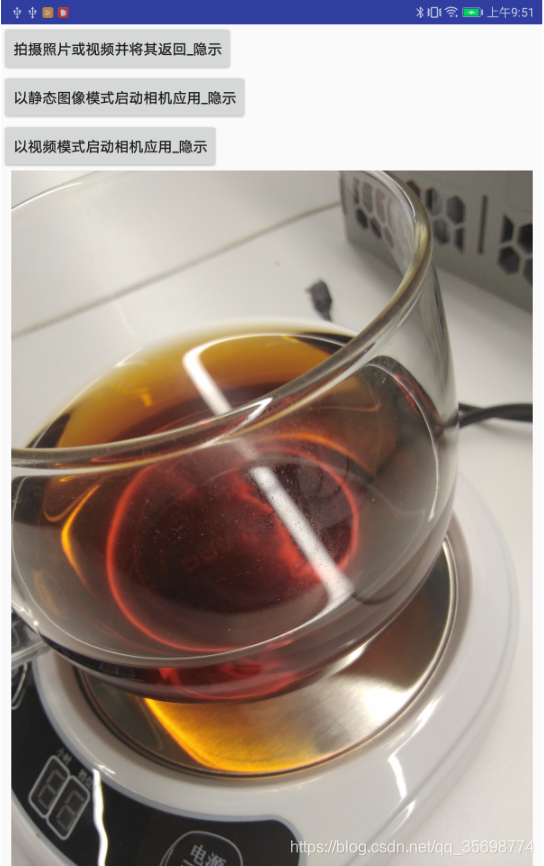
如上图所示,当点击“拍摄照片或视频并将其返回_隐示”的时候跳转到相机页面,点击拍照选择对号完成拍摄,并返回数据,具体代码入下:
过滤器:
 <intent-filter>
        <action android:name="android.media.action.IMAGE_CAPTURE" />
        <category android:name="android.intent.category.DEFAULT" />
    </intent-filter>
完整代码:
在Main7Activity 中的:
case R.id.button_1:
    capturePhoto("aaa");
    break;
private Uri imageuri;
private File outPutImage;
public void capturePhoto(String targetFilename) {
//创建File对象,用于存储拍照后的图片
outPutImage = new File(getExternalCacheDir(), "output_image.jpg");
Intent intent = new Intent(MediaStore.ACTION_IMAGE_CAPTURE);
if (Build.VERSION.SDK_INT >= 24) {//
imageuri = FileProvider.getUriForFile(Main7Activity.this,
"com.example.administrator.myintent.fileprovider", outPutImage);
} else {
imageuri = Uri.fromFile(outPutImage);
}
intent.putExtra(MediaStore.EXTRA_OUTPUT, imageuri);
// intent.putExtra(MediaStore.EXTRA_OUTPUT, Uri.withAppendedPath(locationForPhotos, targetFilename));
if (intent.resolveActivity(getPackageManager()) != null) {
startActivityForResult(intent, REQUEST_IMAGE_CAPTURE);
}
}
@Override
protected void onActivityResult(int requestCode, int resultCode, Intent data) {
if (requestCode == REQUEST_IMAGE_CAPTURE && resultCode == RESULT_OK) {
// Bitmap thumbnail = data.getParcelableExtra("data");
ImageView imageView = findViewById(R.id.iv);
// imageView.setImageBitmap(thumbnail);
try {
Bitmap bitmap = BitmapFactory.decodeStream(getContentResolver().openInputStream(imageuri));
imageView.setImageBitmap(bitmap);
} catch (FileNotFoundException e) {
e.printStackTrace();
}
// Do other work with full size photo saved in locationForPhotos
}
}在 Main7Activity 的xml中的:
<Button
    android:id="@+id/button_1"
    android:layout_width="wrap_content"
    android:layout_height="wrap_content"
    android:onClick="onClick"
    android:text="拍摄照片或视频并将其返回_隐示" />
<ImageView
    android:id="@+id/iv"
    android:layout_width="wrap_content"
    android:layout_height="wrap_content" />
补充适配7.0绝对路径报错问题:
<provider
    android:name="android.support.v4.content.FileProvider"
    android:authorities="包名.fileprovider"
    android:exported="false"
    android:grantUriPermissions="true">
    <meta-data
        android:name="android.support.FILE_PROVIDER_PATHS"
        android:resource="@xml/file_paths" />
</provider>
file_paths:
<?xml version="1.0" encoding="utf-8"?>
<paths>
    <external-path path="Android/data/你的包名/" name="files_root" />
    <external-path path="." name="external_storage_root" />
</paths>
5.5.2.2 以静态图像模式启动相机应用

点击“以静态图像模式启动相机应用_隐示”按钮的时候,跳转到相机
过滤器:
<intent-filter>
        <action android:name="android.media.action.STILL_IMAGE_CAMERA" />
        <category android:name="android.intent.category.DEFAULT" />
    </intent-filter>
具体代码:
在Main7Activity 中:
case R.id.button_2:
    capturePhoto1();
    break;
public void capturePhoto1() {
Intent intent = new Intent(MediaStore.INTENT_ACTION_STILL_IMAGE_CAMERA);
if (intent.resolveActivity(getPackageManager()) != null) {
startActivityForResult(intent, REQUEST_IMAGE_CAPTURE);
}
}对应的想xml:
<Button
    android:id="@+id/button_2"
    android:layout_width="wrap_content"
    android:layout_height="wrap_content"
    android:onClick="onClick"
    android:text="以静态图像模式启动相机应用_隐示" />
5.5.2.3 以视屏方式启动相机应用
当点击“以视频模式启动相机应用_隐示”同样条转到相机
过滤器:
<intent-filter>
        <action android:name="android.media.action.VIDEO_CAMERA" />
        <category android:name="android.intent.category.DEFAULT" />
    </intent-filter>
具体代码:
在Main7Activity中?:
case R.id.button_3:
    capturePhoto();
    break;
public void capturePhoto() {
Intent intent = new Intent(MediaStore.INTENT_ACTION_VIDEO_CAMERA);
if (intent.resolveActivity(getPackageManager()) != null) {
startActivityForResult(intent, REQUEST_IMAGE_CAPTURE);
}
}对应的xml:
<Button
    android:id="@+id/button_3"
    android:layout_width="wrap_content"
    android:layout_height="wrap_content"
    android:onClick="onClick"
    android:text="以视频模式启动相机应用_隐示" />
5.5.4 联系人、人员应用


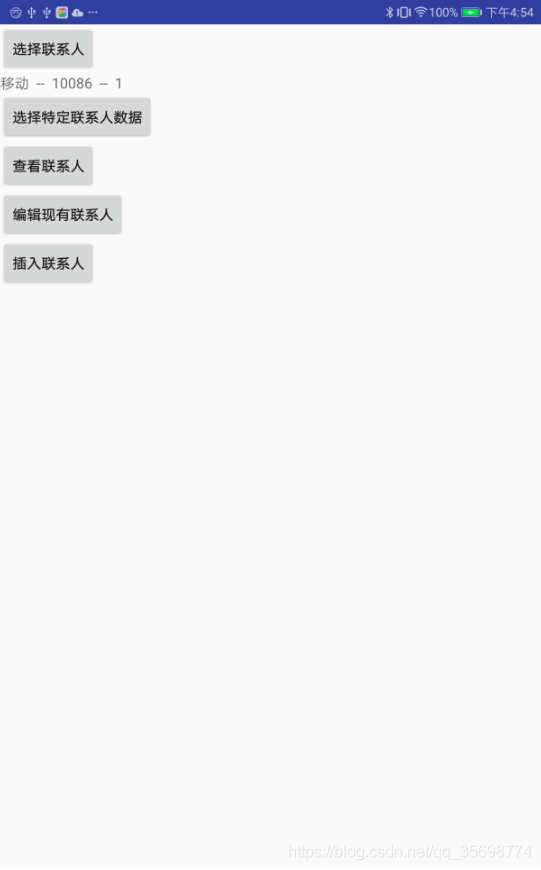
点击左侧的“联系人、人员应用”跳转到右侧页面。
在MainActivity中跳转的代码:
case R.id.button_8:
    intent = new Intent(this, Main8Activity.class);
    startActivity(intent);
    break;
xml:
<Button
    android:id="@+id/button_8"
    android:layout_width="wrap_content"
    android:layout_height="wrap_content"
    android:onClick="onClick"
    android:text="联系人、人员应用" />
5.5.4.1选择联系人
点击“选择联系人”跳转到选择联系人页面如下:
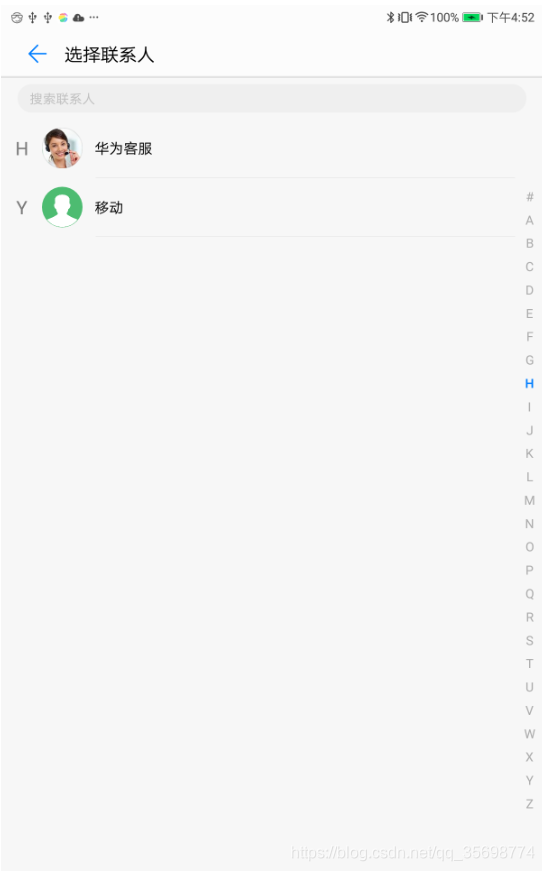
选择“移动”,跳转回去,查看页面
具体代码如下:
Intent intent = new Intent(Intent.ACTION_PICK);
intent.setType(ContactsContract.Contacts.CONTENT_TYPE);
完整代码:
测试机用的7.0的所以做了一个权限处理,如果只是跳转不往回拿数据是不用权限的,如果要往回拿数据需要读取联系人信息,
清单文件:
!--读取联系人的信息-->
<uses-permission android:name="android.permission.READ_CONTACTS"/>
在Main8Activity中的
case R.id.button_1:
    //**版本判断。当手机系统大于 23 时,才有必要去判断权限是否获取**
    if (Build.VERSION.SDK_INT >= Build.VERSION_CODES.M) {
        //ContextCompat.checkSelfPermission() 方法 指定context和某个权限 返回PackageManager.PERMISSION_DENIED或者PackageManager.PERMISSION_GRANTED
        if (ContextCompat.checkSelfPermission(Main8Activity.this, android.Manifest.permission.READ_CONTACTS)
                != PackageManager.PERMISSION_GRANTED) {
            // 若不为GRANTED(即为DENIED)则要申请权限了
            // 申请权限 第一个为context 第二个可以指定多个请求的权限 第三个参数为请求码
            ActivityCompat.requestPermissions(Main8Activity.this,
                    new String[]{android.Manifest.permission.READ_CONTACTS},
                    READ_REQUEST_CONTACTS);
        } else {
            //权限已经被授予,在这里直接写要执行的相应方法即可
            selectContact();
        }
    } else {
        // 低于6.0的手机直接访问
        selectContact();
    }

    break;
权限回调:
@Override
public void onRequestPermissionsResult(int requestCode, @NonNull String[] permissions, @NonNull int[] grantResults) {
    switch (requestCode) {
        case READ_REQUEST_CONTACTS:
            if (grantResults.length > 0 && grantResults[0] == PackageManager.PERMISSION_GRANTED) {
                // Permission Granted 授予权限
                selectContact();
            } else {
                // Permission Denied 权限被拒绝
                Toast.makeText(Main8Activity.this, "Permission Denied",
                        Toast.LENGTH_SHORT).show();
            }

            break;
        default:
            break;
    }
    super.onRequestPermissionsResult(requestCode, permissions, grantResults);

}
跳转联系人:
public void selectContact() {

    Intent intent = new Intent(Intent.ACTION_PICK);
    intent.setType(ContactsContract.Contacts.CONTENT_TYPE);
    if (intent.resolveActivity(getPackageManager()) != null) {
        startActivityForResult(intent, REQUEST_SELECT_CONTACT);
    }
}
数据回调:
@Override
protected void onActivityResult(int requestCode, int resultCode, Intent data) {
    if (requestCode == REQUEST_SELECT_CONTACT && resultCode == RESULT_OK) {


        if (data != null) {
            TextView tv = findViewById(R.id.tv);

            ContentResolver reContentResolverol = getContentResolver();
            Uri contactData = data.getData();
            @SuppressWarnings("deprecation")
            Cursor cursor = managedQuery(contactData, null, null, null, null);
            cursor.moveToFirst();
            String username = cursor.getString(cursor.getColumnIndex(ContactsContract.Contacts.DISPLAY_NAME));
            String contactId = cursor.getString(cursor.getColumnIndex(ContactsContract.Contacts._ID));
            Cursor phone = reContentResolverol.query(ContactsContract.CommonDataKinds.Phone.CONTENT_URI,
                    null,
                    ContactsContract.CommonDataKinds.Phone.CONTACT_ID + " = " + contactId,
                    null,
                    null);
            while (phone.moveToNext()) {
                String usernumber = phone.getString(phone.getColumnIndex(ContactsContract.CommonDataKinds.Phone.NUMBER));

                tv.setText(username + "  --  " + usernumber + "  --  " + contactId);
            }
        }
    }
}
对应的xml:
<Button
    android:id="@+id/button_1"
    android:layout_width="wrap_content"
    android:layout_height="wrap_content"
    android:onClick="onClick"
    android:text="选择联系人" />

<TextView
    android:id="@+id/tv"
    android:layout_width="wrap_content"
    android:layout_height="wrap_content" />
5.5.4.2选择特定联系人返回电话
模拟输入姓名返回电话号码:
在:Main8Activity中的
case R.id.button_2:
    TextView tv1 = findViewById(R.id.tv1);
    tv1.setText(nameGetNumber("移动"));
    break;
/**
* 根据名字获取电话
*/
public String nameGetNumber(String name) {
Cursor cursor = this.getContentResolver().query(ContactsContract.Contacts.CONTENT_URI, null, null, null, null);
while (cursor.moveToNext()) {
String contactId = cursor.getString(cursor.getColumnIndex(ContactsContract.Contacts._ID));
String contactName = cursor.getString(cursor.getColumnIndex(ContactsContract.CommonDataKinds.Phone.DISPLAY_NAME));
if (name.equals(contactName)) {
Cursor phone = this.getContentResolver().query(ContactsContract.CommonDataKinds.Phone.CONTENT_URI, null, ContactsContract.CommonDataKinds.Phone.CONTACT_ID + " = " + contactId, null, null);
if (phone.moveToNext()) {
String phoneNumber = phone.getString(phone.getColumnIndex(ContactsContract.CommonDataKinds.Phone.NUMBER));
return phoneNumber;
}
} else {
//TODO 根据姓名没有查找到联系人给用户做一个友好提示
}
}
return "error";
}对应的xml:
<Button
    android:id="@+id/button_2"
    android:layout_width="wrap_content"
    android:layout_height="wrap_content"
    android:onClick="onClick"
    android:text="选择特定联系人" />

<TextView
    android:id="@+id/tv1"
    android:layout_width="wrap_content"
    android:layout_height="wrap_content" />
5.5.4.3查看联系人
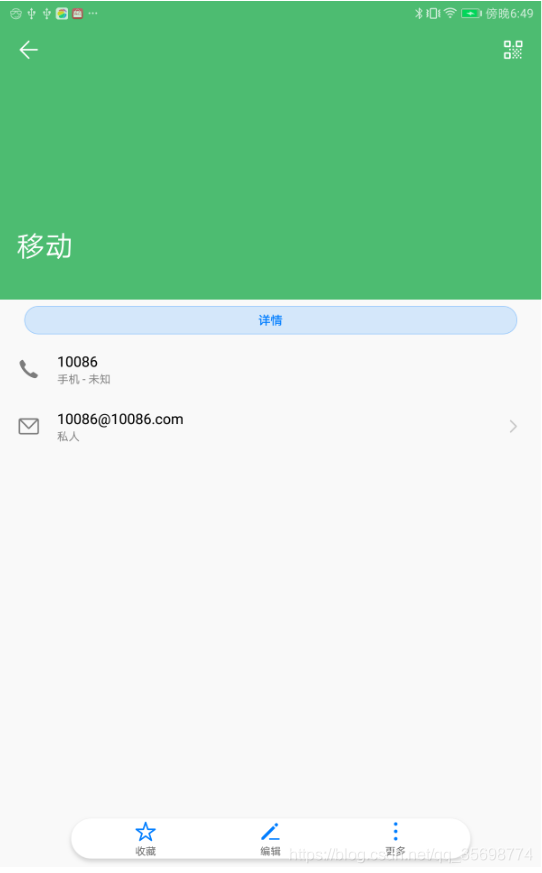
点击“查看联系人” 跳转到具体联系人页面
在:Main8Activity中的
case R.id.button_3:
                viewContact(Uri.parse("content://com.android.contacts/contacts/lookup/1885r1-97835D25/1"));
                break;
public void viewContact(Uri contactUri) {
Intent intent = new Intent(Intent.ACTION_VIEW, contactUri);
if (intent.resolveActivity(getPackageManager()) != null) {
startActivity(intent);
} else {
Toast.makeText(this, "失败", Toast.LENGTH_SHORT).show();
}
}对应的xml:
<Button
    android:id="@+id/button_3"
    android:layout_width="wrap_content"
    android:layout_height="wrap_content"
    android:onClick="onClick"
    android:text="查看联系人" />
5.5.4.4编辑现有联系人

点击“编辑现有联系人”,跳转到特定的联系人页面并修改,URI的数据是之前获取的直接输入的。
在:Main8Activity中的
case R.id.button_4:
    editContact(Uri.parse("content://com.android.contacts/contacts/lookup/1885r1-97835D25/1"), "10086@10086.com");
    break;
public void editContact(Uri contactUri, String email) {
Intent intent = new Intent(Intent.ACTION_EDIT);
intent.setData(contactUri);
intent.putExtra(ContactsContract.Intents.Insert.EMAIL, email);
if (intent.resolveActivity(getPackageManager()) != null) {
startActivity(intent);
} else {
Toast.makeText(this, "失败", Toast.LENGTH_SHORT).show();
}
}对应的xml:
<Button
    android:id="@+id/button_4"
    android:layout_width="wrap_content"
    android:layout_height="wrap_content"
    android:onClick="onClick"
    android:text="编辑现有联系人" />
5.5.4.5插入联系人
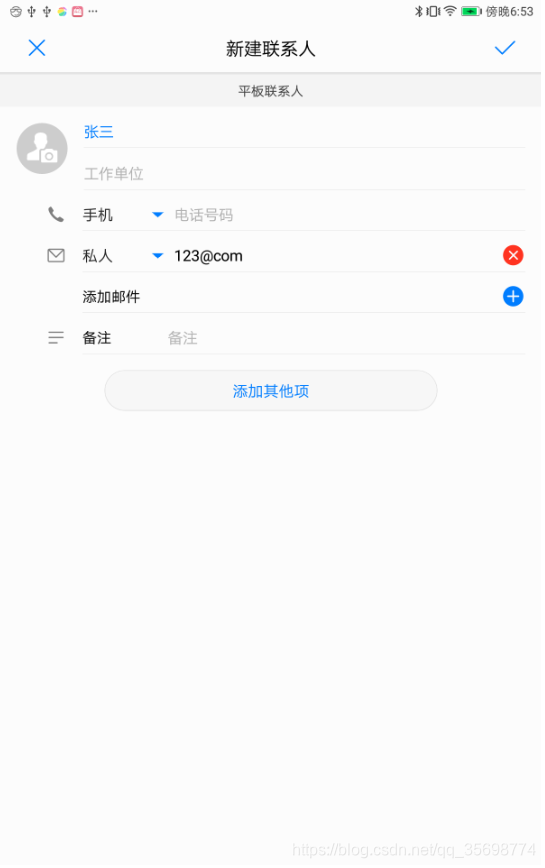
点击“插入联系人”跳转到新建联系人中,具体代码如下:
在:Main8Activity中的
case R.id.button_5:
    insertContact("张三", "123@com");
    break;
public void insertContact(String name, String email) {
Intent intent = new Intent(Intent.ACTION_INSERT);
intent.setType(ContactsContract.Contacts.CONTENT_TYPE);
intent.putExtra(ContactsContract.Intents.Insert.NAME, name);
intent.putExtra(ContactsContract.Intents.Insert.EMAIL, email);
if (intent.resolveActivity(getPackageManager()) != null) {
startActivity(intent);
}
}对应的xml:
<Button
    android:id="@+id/button_5"
    android:layout_width="wrap_content"
    android:layout_height="wrap_content"
    android:onClick="onClick"
    android:text="插入联系人" />
5.5.5 电子邮件

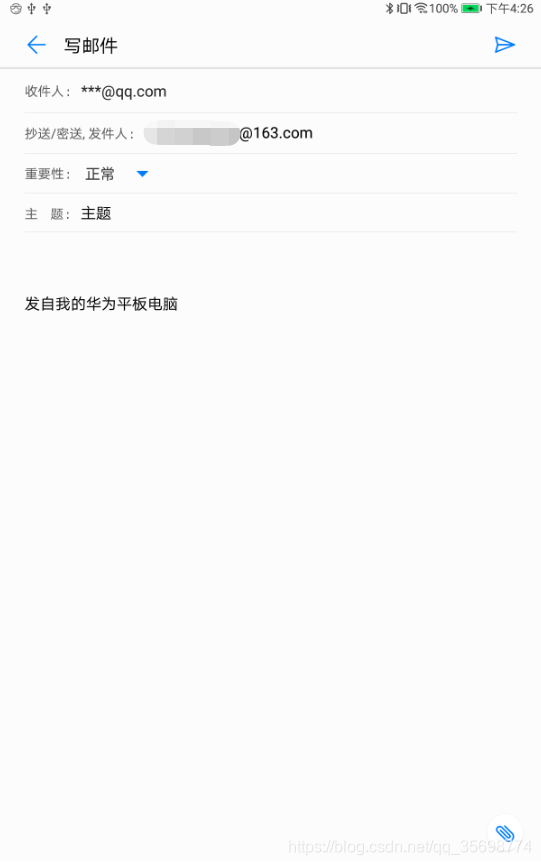
点击左侧图上的“电子邮件”,跳转到发送邮件界面,前提是已经登录了。
Intent intent = new Intent(Intent.ACTION_SEND);过滤器:
 <intent-filter>
        <action android:name="android.intent.action.SEND" />
        <data android:type="*/*" />
        <category android:name="android.intent.category.DEFAULT" />
    </intent-filter>
    <intent-filter>
        <action android:name="android.intent.action.SENDTO" />
        <data android:scheme="mailto" />
        <category android:name="android.intent.category.DEFAULT" />
    </intent-filter>
具体代码:
在MainActivity中
case R.id.button_9:
                String[] email = {"***@qq.com"};
                // 附件
                File file = new File(Environment.getExternalStorageDirectory().getPath()+
                        File.separator + "simplenote"+ File.separator+"note.xml");
//                composeEmail(email,"主题", Uri.fromFile(file));
                composeEmail(email,"主题");
                break;
/**
* ACTION_SENDTO(适用于不带附件)
* ACTION_SEND(适用于带一个附件)
* ACTION_SEND_MULTIPLE(适用于带多个附件)
* <p>
* Intent.EXTRA_EMAIL 包含所有“主送”收件人电子邮件地址的字符串数组。
* Intent.EXTRA_CC 包含所有“抄送”收件人电子邮件地址的字符串数组。
* Intent.EXTRA_BCC 包含所有“密件抄送”收件人电子邮件地址的字符串数组。
* Intent.EXTRA_SUBJECT 包含电子邮件主题的字符串。
* Intent.EXTRA_TEXT 包含电子邮件正文的字符串。
* Intent.EXTRA_STREAM 指向附件的 Uri。如果使用的是 ACTION_SEND_MULTIPLE 操作,应将其改为包含多个 Uri 对象的 ArrayList。
*
* @param addresses 包含所有“主送”收件人电子邮件地址的字符串数组
* @param subject 包含电子邮件主题的字符串。
* @param attachment 指向附件的 Uri。如果使用的是 ACTION_SEND_MULTIPLE 操作,应将其改为包含多个 Uri 对象的 ArrayList。
*/
public void composeEmail(String[] addresses, String subject, Uri attachment) {
Intent intent = new Intent(Intent.ACTION_SEND);
intent.setType("*/*");
intent.putExtra(Intent.EXTRA_EMAIL, addresses);
intent.putExtra(Intent.EXTRA_SUBJECT, subject);
// intent.putExtra(Intent.EXTRA_STREAM, attachment);
if (intent.resolveActivity(getPackageManager()) != null) {
startActivity(intent);
}
}
/**
* 如果您想确保 Intent 只由电子邮件应用(而非其他短信或社交应用)进行处理,则需使用 ACTION_SENDTO 操作并加入 "mailto:" 数据架构。例如:
* @param addresses
* @param subject
*/
public void composeEmail(String[] addresses, String subject) {
Intent intent = new Intent(Intent.ACTION_SENDTO);
intent.setData(Uri.parse("mailto:")); // only email apps should handle this
intent.putExtra(Intent.EXTRA_EMAIL, addresses);
intent.putExtra(Intent.EXTRA_SUBJECT, subject);
if (intent.resolveActivity(getPackageManager()) != null) {
startActivity(intent);
}
}对应的xml:
<Button
    android:id="@+id/button_9"
    android:layout_width="wrap_content"
    android:layout_height="wrap_content"
    android:onClick="onClick"
    android:text="电子邮件" />
5.5.6 文件存储

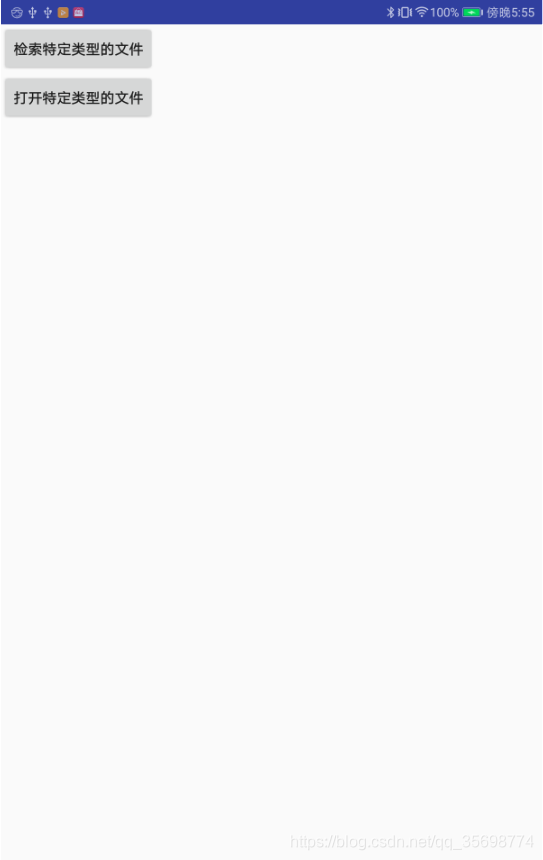
点击左侧的“文件存储”跳转到右侧列表。
5.5.6.1 检索特定类型的文件


点击“检索特定类型的文件”跳转到相册文件,选择图片返回。
具体代码:
Intent intent = new Intent(Intent.ACTION_GET_CONTENT);过滤器:
<intent-filter> <action android:name="android.intent.action.GET_CONTENT" /> <data android:type="image/*" /> <category android:name="android.intent.category.DEFAULT" /> <!-- The OPENABLE category declares that the returned file is accessible from a content provider that supportsOpenableColumnsandContentResolver.openFileDescriptor()--> <category android:name="android.intent.category.OPENABLE" /> </intent-filter>
完整代码:
case R.id.button_1:
    selectImage();
    break;
static final int REQUEST_IMAGE_GET = 1;
/**
* EXTRA_ALLOW_MULTIPLE 一个布尔型值,声明用户是否可以一次选择多个文件。
* EXTRA_LOCAL_ONLY 一个布尔型值,声明是否返回的文件必须直接存在于设备上,而不是需要从远程服务下载。
*/
public void selectImage() {
Intent intent = new Intent(Intent.ACTION_GET_CONTENT);
intent.setType("image/*");
if (intent.resolveActivity(getPackageManager()) != null) {
startActivityForResult(intent, REQUEST_IMAGE_GET);
}
}
 @Override
    protected void onActivityResult(int requestCode, int resultCode, Intent data) {
        if (requestCode == REQUEST_IMAGE_GET && resultCode == RESULT_OK) {
//            Bitmap thumbnail = data.getParcelable("data");
            Uri fullPhotoUri = data.getData();
            // Do work with photo saved at fullPhotoUri
            ImageView iv = findViewById(R.id.iv);
            try {
                Bitmap bitmap = BitmapFactory.decodeStream(getContentResolver().openInputStream(fullPhotoUri));
                iv.setImageBitmap(bitmap);
            } catch (FileNotFoundException e) {
                e.printStackTrace();
            }

        }
    }
对应的xml:
<Button
    android:id="@+id/button_1"
    android:onClick="onClick"
    android:layout_width="wrap_content"
    android:layout_height="wrap_content"
    android:text="检索特定类型的文件"/>
<ImageView
    android:layout_width="wrap_content"
    android:layout_height="wrap_content"
    android:id="@+id/iv"/>
5.5.6.2 打开特定类型的文件

点击“打开特定类型的文件”按钮跳转到文件夹,只有图片,选取图片返回。
具体代码:
Intent intent = new Intent(Intent.ACTION_OPEN_DOCUMENT);如需在该 UI 中提供您的应用的文件,并允许其他应用打开这些文件,您必须实现一个 DocumentsProvider,并加入一个 PROVIDER_INTERFACEIntent 过滤器 ("android.content.action.DOCUMENTS_PROVIDER")。例如:
<provider ...
    android:grantUriPermissions="true"
    android:exported="true"
    android:permission="android.permission.MANAGE_DOCUMENTS">
    <intent-filter>
        <action android:name="android.content.action.DOCUMENTS_PROVIDER" />
    </intent-filter>
</provider>
完整代码:
case R.id.button_2:
    selectImage1();
    break;
static final int REQUEST_IMAGE_OPEN = 1;
/**
* EXTRA_MIME_TYPES 与您的应用请求的文件类型对应的 MIME 类型数组。当您使用此 extra 时,必须在 setType() 中将主 MIME 类型设置为 " * / * "
* EXTRA_ALLOW_MULTIPLE 一个布尔型值,声明用户是否可以一次选择多个文件。
* EXTRA_TITLE 供与ACTION_CREATE_DOCUMENT 配合使用,用于指定初始文件名。
* EXTRA_LOCAL_ONLY 一个布尔型值,声明是否返回的文件必须直接存在于设备上,而不是需要从远程服务下载。
*/
public void selectImage1() {
Intent intent = new Intent(Intent.ACTION_OPEN_DOCUMENT);
intent.setType("image/*");
intent.addCategory(Intent.CATEGORY_OPENABLE);
// Only the system receives the ACTION_OPEN_DOCUMENT, so no need to test.
startActivityForResult(intent, REQUEST_IMAGE_OPEN);
} @Override
protected void onActivityResult(int requestCode, int resultCode, Intent data) {
if (requestCode == REQUEST_IMAGE_OPEN && resultCode == RESULT_OK) {
Uri fullPhotoUri = data.getData();
// Do work with full size photo saved at fullPhotoUri
ImageView iv = findViewById(R.id.iv);
try {
Bitmap bitmap = BitmapFactory.decodeStream(getContentResolver().openInputStream(fullPhotoUri));
iv.setImageBitmap(bitmap);
} catch (FileNotFoundException e) {
e.printStackTrace();
}
}
}对应的xml:
<Button
    android:id="@+id/button_2"
    android:onClick="onClick"
    android:layout_width="wrap_content"
    android:layout_height="wrap_content"
    android:text="打开特定类型的文件"/>
<ImageView
    android:layout_width="wrap_content"
    android:layout_height="wrap_content"
    android:id="@+id/iv"/>
5.5.7 本地操作
叫车
Intent intent = new Intent(ReserveIntents.ACTION_RESERVE_TAXI_RESERVATION);过滤器:
<intent-filter>
        <action android:name="com.google.android.gms.actions.RESERVE_TAXI_RESERVATION" />
        <category android:name="android.intent.category.DEFAULT" />
    </intent-filter>
完整代码:
case R.id.button_11:
    callCar();
    break;
public void callCar() {
Intent intent = new Intent(ReserveIntents.ACTION_RESERVE_TAXI_RESERVATION);
if (intent.resolveActivity(getPackageManager()) != null) {
startActivity(intent);
}
}对应的xml:
<Button
    android:id="@+id/button_11"
    android:layout_width="wrap_content"
    android:layout_height="wrap_content"
    android:onClick="onClick"
    android:text="叫车" />
5.5.8 地图


如上图左,点击“地图”,然后弹出选择地图,最后跳转到地图上,如果只有一个地图软件那么会直接跳到地图上,
具体代码:
Intent intent = new Intent(Intent.ACTION_VIEW);
    intent.setData(geoLocation);
过滤器:
<intent-filter>
        <action android:name="android.intent.action.VIEW" />
        <data android:scheme="geo" />
        <category android:name="android.intent.category.DEFAULT" />
    </intent-filter>
完整代码:
case R.id.button_12:
    Uri uri = Uri.parse("geo:39.915378,116.405419");//打开地图定位
    showMap(uri);
    break;
public void showMap(Uri geoLocation) {
Intent intent = new Intent(Intent.ACTION_VIEW);
intent.setData(geoLocation);
if (intent.resolveActivity(getPackageManager()) != null) {
startActivity(intent);
}
}对应的xml:
<Button
    android:id="@+id/button_12"
    android:layout_width="wrap_content"
    android:layout_height="wrap_content"
    android:onClick="onClick"
    android:text="地图" />
5.5.9 音乐或视频
5.5.9.1播放媒体文件
 case R.id.button_1:

                playMedia(Uri.parse("http://vfx.mtime.cn/Video/2019/02/04/mp4/190204084208765161.mp4"));
                break;
过滤器:
 <intent-filter>
        <action android:name="android.intent.action.VIEW" />
        <data android:type="audio/*" />
        <data android:type="application/ogg" />
        <category android:name="android.intent.category.DEFAULT" />
    </intent-filter>
 /**
     * file:<URI>
     * content:<URI>
     * http:<URL>
     * <p>
     * "audio/*"
     * "application/ogg"
     * "application/x-ogg"
     * "application/itunes"
     *
     * @param uri
     */
    public void playMedia(Uri uri) {
        Intent intent = new Intent(Intent.ACTION_VIEW);
        intent.setData(uri);
//        intent.setDataAndType(uri, "audio/*");
        if (intent.resolveActivity(getPackageManager()) != null) {
            startActivity(intent);
        }
    }
对应的 xml:
<Button
    android:id="@+id/button_1"
    android:layout_width="wrap_content"
    android:layout_height="wrap_content"
    android:text="播放媒体文件"
    android:onClick="onClick"/>
5.5.9.2基于搜索查询播放音乐
对应的xml:
case R.id.button_2:
    playSearchArtist("于文文");
    break;
过滤器:
 <intent-filter>
        <action android:name="android.media.action.MEDIA_PLAY_FROM_SEARCH" />
        <category android:name="android.intent.category.DEFAULT" />
    </intent-filter>
/**
 * MediaStore.EXTRA_MEDIA_FOCUS(必需)表示搜索模式(用户是否在寻找特定艺术家、专辑、歌曲或播放列表)。大多数搜索模式都需要额外的 extra。例如,如果用户有意收听某一首歌曲,Intent 可能需要额外增加三个 extra:歌曲名称、艺术家和专辑。对于 EXTRA_MEDIA_FOCUS 的每个值,此 Intent 都支持下列搜索模式:
 * 1.任意 - "vnd.android.cursor.item/*"播放任意音乐。接收 Intent 的应用应该根据智能选择(如用户最后收听的播放列表)播放音乐。
 * 额外 extra:QUERY(必需)- 一个空字符串。始终提供此 extra,以实现向后兼容性:不了解搜索模式的现有应用可将此 Intent 作为非结构化搜索进行处理。
 * 2.非结构化 - "vnd.android.cursor.item/*"播放通过非结构化搜索查询找到的特定歌曲、专辑或类型。当应用无法识别用户想要收听的内容类型时,可能会生成一个具有此搜索模式的 Intent。应用应尽可能使用更确切的搜索模式。
 * 额外 extra:QUERY(必需)- 一个包含艺术家、专辑、歌曲名称或类型任意组合的字符串。
 * 3.类型 -Audio.Genres.ENTRY_CONTENT_TYPE 播放特定类型的音乐。
 * 额外 extra: "android.intent.extra.genre"(必需)- 类型。 QUERY(必需)- 类型。始终提供此 extra,以实现向后兼容性:不了解搜索模式的现有应用可将此 Intent 作为非结构化搜索进行处理。
 * 4.艺术家 -Audio.Artists.ENTRY_CONTENT_TYPE 播放特定艺术家的音乐。
 * 额外 extra: EXTRA_MEDIA_ARTIST(必需)- 艺术家。
 * "android.intent.extra.genre" - 类型。
 * QUERY(必需)- 一个包含艺术家或类型任意组合的字符串。始终提供此 extra,以实现向后兼容性:不了解搜索模式的现有应用可将此 Intent 作为非结构化搜索进行处理。
 * 5.专辑 -Audio.Albums.ENTRY_CONTENT_TYPE 播放特定专辑的音乐。
 * 额外 extra:
 * EXTRA_MEDIA_ALBUM(必需)- 专辑。
 * EXTRA_MEDIA_ARTIST - 艺术家。
 * "android.intent.extra.genre" - 类型。
 * QUERY(必需)- 一个包含专辑或艺术家任意组合的字符串。始终提供此 extra,以实现向后兼容性:不了解搜索模式的现有应用可将此 Intent 作为非结构化搜索进行处理。
 * 6.歌曲 - "vnd.android.cursor.item/audio" 播放特定歌曲。
 * 额外 extra:
 * EXTRA_MEDIA_ALBUM - 专辑。
 * EXTRA_MEDIA_ARTIST - 艺术家。
 * "android.intent.extra.genre" - 类型。
 * EXTRA_MEDIA_TITLE(必需)- 歌曲名称。
 * QUERY(必需)- 一个包含专辑、艺术家、类型或名称任意组合的字符串。始终提供此 extra,以实现向后兼容性:不了解搜索模式的现有应用可将此 Intent 作为非结构化搜索进行处理。
 * 7.播放列表 - Audio.Playlists.ENTRY_CONTENT_TYPE 播放特定播放列表或符合额外 extra 指定的某些条件的播放列表。
 * 额外 extra:
 * EXTRA_MEDIA_ALBUM - 专辑。
 * EXTRA_MEDIA_ARTIST - 艺术家。
 * "android.intent.extra.genre" - 类型。
 * "android.intent.extra.playlist" - 播放列表。
 * EXTRA_MEDIA_TITLE - 播放列表所基于的歌曲名称。
 * QUERY(必需)- 一个包含专辑、艺术家、类型、播放列表或名称任意组合的字符串。始终提供此 extra,以实现向后兼容性:不了解搜索模式的现有应用可将此 Intent 作为非结构化搜索进行处理。
 *
 *
 *
 * @param artist
 */
public void playSearchArtist(String artist) {
    Intent intent = new Intent(MediaStore.INTENT_ACTION_MEDIA_PLAY_FROM_SEARCH);
    intent.putExtra(MediaStore.EXTRA_MEDIA_FOCUS,
            MediaStore.Audio.Artists.ENTRY_CONTENT_TYPE);
    intent.putExtra(MediaStore.EXTRA_MEDIA_ARTIST, artist);
    intent.putExtra(SearchManager.QUERY, artist);
    if (intent.resolveActivity(getPackageManager()) != null) {
        startActivity(intent);
    }
}
<Button
    android:id="@+id/button_2"
    android:layout_width="wrap_content"
    android:layout_height="wrap_content"
    android:text="基于搜索查询播放音乐"
    android:onClick="onClick"/>
5.5.10 新笔记
具体代码:
Intent intent = new Intent(NoteIntents.ACTION_CREATE_NOTE)
            .putExtra(NoteIntents.EXTRA_NAME, subject)
            .putExtra(NoteIntents.EXTRA_TEXT, text);
过滤器:
 <intent-filter>
        <action android:name="com.google.android.gms.actions.CREATE_NOTE" />
        <category android:name="android.intent.category.DEFAULT" />
        <data android:mimeType="*/*" />
    </intent-filter>
完成代码:
case R.id.button_14:
    createNote("", "");
    break;
/**
* EXTRA_NAME 一个表示笔记标题或主题的字符串。
* EXTRA_TEXT 一个表示笔记正文的字符串。
*
* @param subject
* @param text
*/
public void createNote(String subject, String text) {
Intent intent = new Intent(NoteIntents.ACTION_CREATE_NOTE)
.putExtra(NoteIntents.EXTRA_NAME, subject)
.putExtra(NoteIntents.EXTRA_TEXT, text);
if (intent.resolveActivity(getPackageManager()) != null) {
startActivity(intent);
}
}对应的xml:
<Button
    android:id="@+id/button_14"
    android:layout_width="wrap_content"
    android:layout_height="wrap_content"
    android:onClick="onClick"
    android:text="创建笔记" />
5.5.11 电话

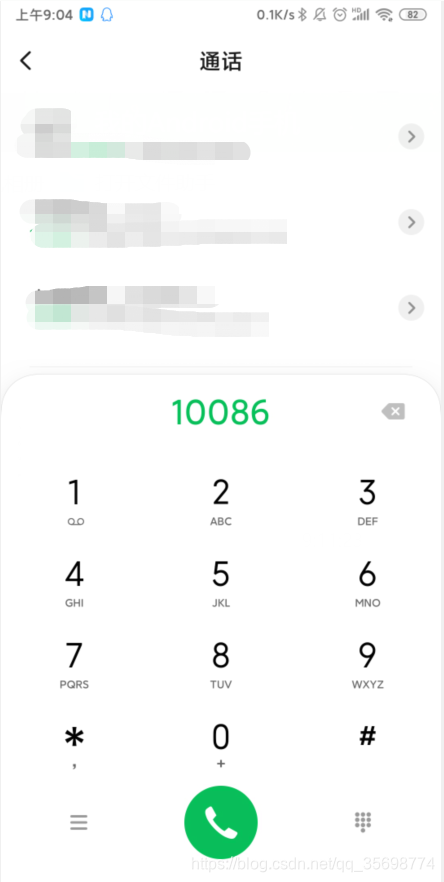
如上图点击“发起通话”,跳转到通话页面
需要添加权限:<uses-permission android:name=”android.permission.CALL_PHONE” />
具体代码:
Intent intent = new Intent(Intent.ACTION_DIAL);完整代码:
case R.id.button_15:
    //**版本判断。当手机系统大于 23 时,才有必要去判断权限是否获取**
    if (Build.VERSION.SDK_INT >= Build.VERSION_CODES.M) {
        //ContextCompat.checkSelfPermission() 方法 指定context和某个权限 返回PackageManager.PERMISSION_DENIED或者PackageManager.PERMISSION_GRANTED
        if (ContextCompat.checkSelfPermission(MainActivity.this, Manifest.permission.CALL_PHONE)
                != PackageManager.PERMISSION_GRANTED) {
            // 若不为GRANTED(即为DENIED)则要申请权限了
            // 申请权限 第一个为context 第二个可以指定多个请求的权限 第三个参数为请求码
            ActivityCompat.requestPermissions(MainActivity.this,
                    new String[]{Manifest.permission.CALL_PHONE}, CALL_PHONE);
        } else {
            //权限已经被授予,在这里直接写要执行的相应方法即可
            dialPhoneNumber("10086");
        }
    } else {
        // 低于6.0的手机直接访问
        dialPhoneNumber("10086");
    }
    break;
static final int CALL_PHONE = 3;

/**
 * ACTION_DIAL - 打开拨号器或电话应用。
 * ACTION_CALL - 拨打电话(需要 CALL_PHONE 权限)
 *
 * @param phoneNumber
 */
public void dialPhoneNumber(String phoneNumber) {
    Intent intent = new Intent(Intent.ACTION_DIAL);
    intent.setData(Uri.parse("tel:" + phoneNumber));
    if (intent.resolveActivity(getPackageManager()) != null) {
        startActivity(intent);
    }
}

@Override
public void onRequestPermissionsResult(int requestCode, @NonNull String[] permissions, @NonNull int[] grantResults) {
    switch (requestCode) {
        case CALL_PHONE:
            if (grantResults.length > 0 && grantResults[0] == PackageManager.PERMISSION_GRANTED) {
                // Permission Granted 授予权限
                dialPhoneNumber("10086");
            } else {
                // Permission Denied 权限被拒绝
                Toast.makeText(MainActivity.this, "Permission Denied",
                        Toast.LENGTH_SHORT).show();
            }

            break;
        default:
            break;
    }
    super.onRequestPermissionsResult(requestCode, permissions, grantResults);

}
对应的xml:
<Button
    android:id="@+id/button_15"
    android:layout_width="wrap_content"
    android:layout_height="wrap_content"
    android:onClick="onClick"
    android:text="发起通话" />
5.5.12 搜索
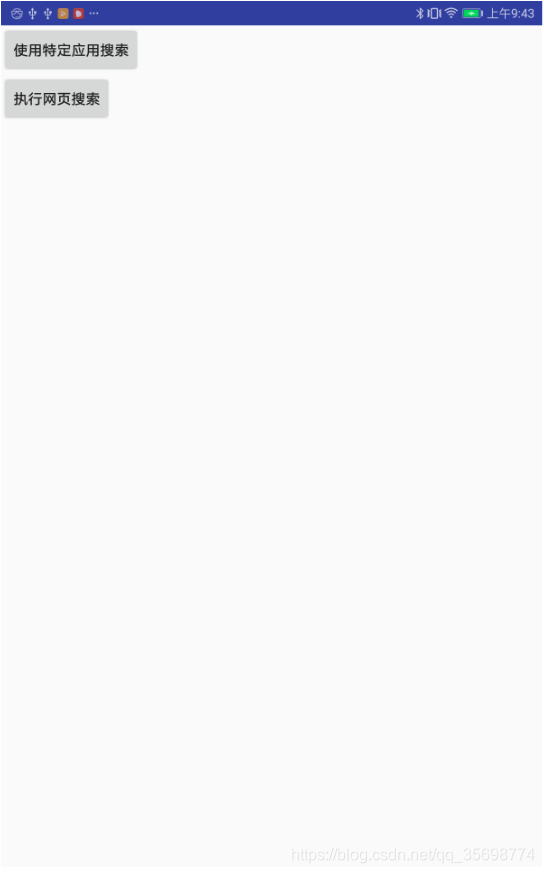
点击左侧“搜索”,跳转到右侧页面。
5.5.12.1 使用特定应用搜索
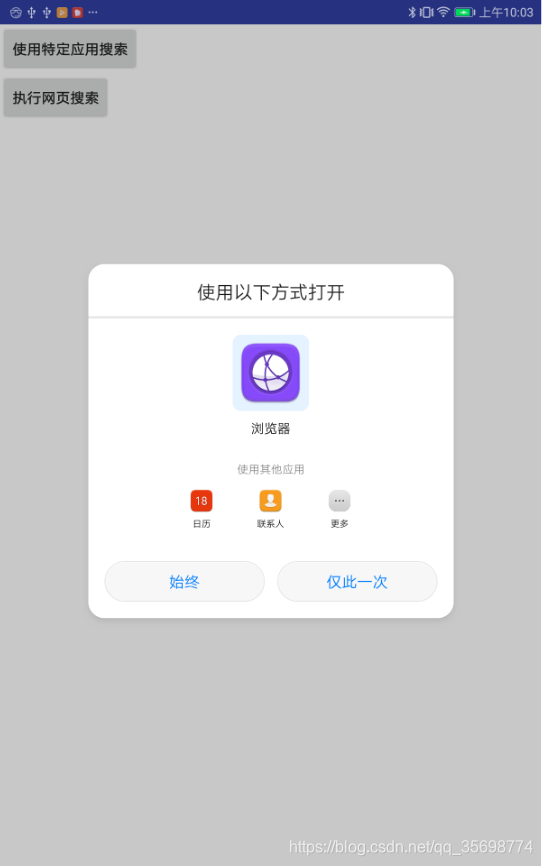
点击“使用特定应用搜索”按钮如图,弹出选择框。
具体代码:过滤器
<activity android:name=".SearchActivity">
    <intent-filter>
        <action android:name="com.google.android.gms.actions.SEARCH_ACTION"/>
        <category android:name="android.intent.category.DEFAULT"/>
    </intent-filter>
</activity>
完整代码:
case R.id.button_1:
    searchAction();
    break;
public void searchAction() {
Intent intent = new Intent(Intent.ACTION_SEARCH);
if (intent.resolveActivity(getPackageManager()) != null) {
startActivity(intent);
}
}5.5.12.2 执行网页搜索

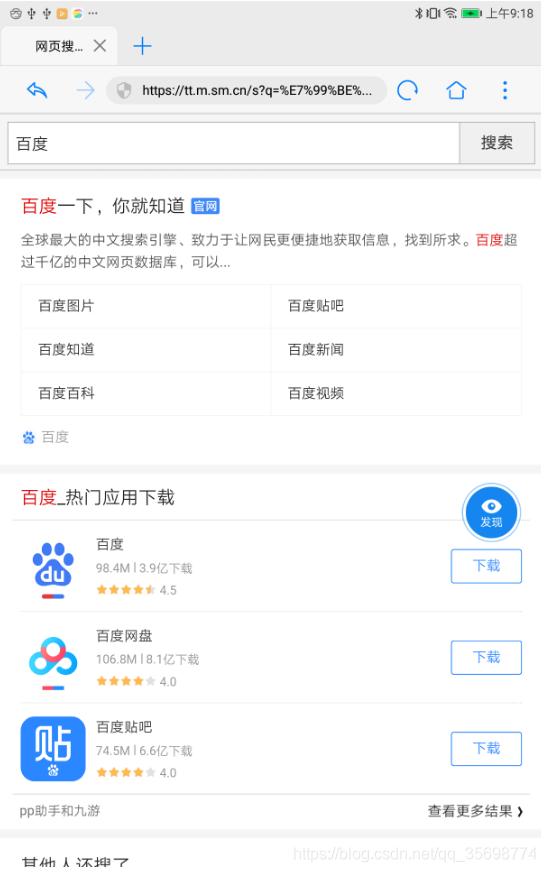
如上图所示点击“执行网页搜索”,跳转到网页搜索。
具体代码:
Intent intent = new Intent(Intent.ACTION_WEB_SEARCH);完整代码:
case R.id.button_2:
    searchWeb("百度");
    break;
/**
* @param query 搜索的字符串
*/
public void searchWeb(String query) {
Intent intent = new Intent(Intent.ACTION_WEB_SEARCH);
intent.putExtra(SearchManager.QUERY, query);
if (intent.resolveActivity(getPackageManager()) != null) {
startActivity(intent);
}
}对应的xml:
<Button
    android:id="@+id/button_2"
    android:layout_width="wrap_content"
    android:layout_height="wrap_content"
    android:onClick="onClick"
    android:text="执行网页搜索" />
5.5.13 设置

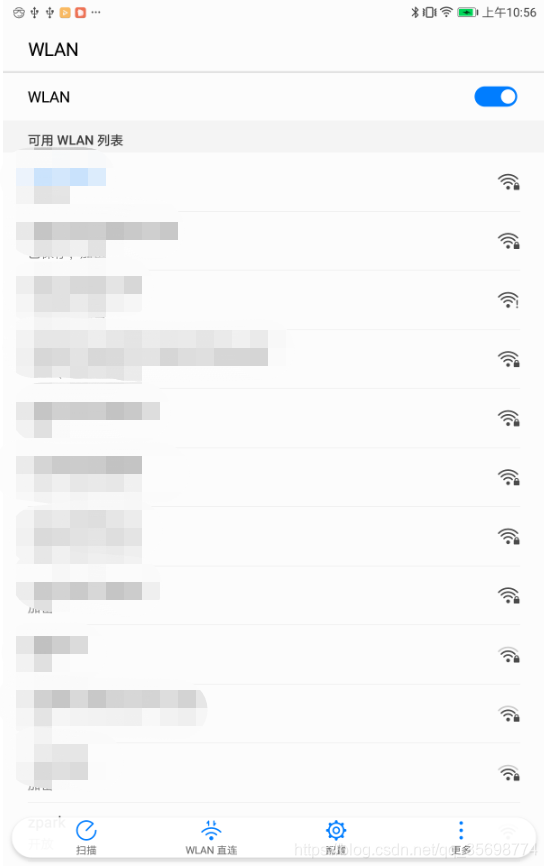
可以设置很多,以设置wifi为例。如上图点击左侧甚至,跳转到wifi列表。
完整代码:
case R.id.button_17:
    openWifiSettings();
    break;
/**
* ACTION_SETTINGS
* ACTION_WIRELESS_SETTINGS
* ACTION_AIRPLANE_MODE_SETTINGS
* ACTION_WIFI_SETTINGS
* ACTION_APN_SETTINGS
* ACTION_BLUETOOTH_SETTINGS
* ACTION_DATE_SETTINGS
* ACTION_LOCALE_SETTINGS
* ACTION_INPUT_METHOD_SETTINGS
* ACTION_DISPLAY_SETTINGS
* ACTION_SECURITY_SETTINGS
* ACTION_LOCATION_SOURCE_SETTINGS
* ACTION_INTERNAL_STORAGE_SETTINGS
* ACTION_MEMORY_CARD_SETTINGS
*/
public void openWifiSettings() {
Intent intent = new Intent(Settings.ACTION_WIFI_SETTINGS);
if (intent.resolveActivity(getPackageManager()) != null) {
startActivity(intent);
}
}对应的xml:
<Button
    android:id="@+id/button_17"
    android:layout_width="wrap_content"
    android:layout_height="wrap_content"
    android:onClick="onClick"
    android:text="设置" />
5.5.14 发送短信
如需发起短信或彩信,请使用以下其中一个 Intent 操作,并使用下列 extra 键指定电话号码、主题和消息正文等消息详情。
具体代码:
ACTION_SENDTO 或ACTION_SEND 或ACTION_SEND_MULTIPLE
过滤器:
<activity ...>
    <intent-filter>
        <action android:name="android.intent.action.SEND" />
        <data android:type="text/plain" />
        <data android:type="image/*" />
        <category android:name="android.intent.category.DEFAULT" />
    </intent-filter>
</activity>
完整代码:
case R.id.button_18:
    composeMmsMessage("5G",Uri.parse(""));
    break;
/**
* 操作
* ACTION_SENDTO 或
* ACTION_SEND 或
* ACTION_SEND_MULTIPLE
* 数据 URI 架构
* sms:<phone_number>
* smsto:<phone_number>
* mms:<phone_number>
* mmsto:<phone_number>
* 以上每一个架构的处理方式都相同。
* <p>
* MIME 类型
* "text/plain"
* "image/*"
* "video/*"
* Extra
* "subject"
* 表示消息主题的字符串(通常只适用于彩信)。
* "sms_body"
* 表示消息正文的字符串。
* EXTRA_STREAM
* 指向要附加的图像或视频的 Uri。如果使用的是 ACTION_SEND_MULTIPLE 操作,此 extra 应为指向要附加的图像/视频 Uri 的 ArrayList。
*
* @param message
* @param attachment
*/
public void composeMmsMessage1(String message, Uri attachment) {
Intent intent = new Intent(Intent.ACTION_SENDTO);
intent.setType(HTTP.PLAIN_TEXT_TYPE);
intent.putExtra("sms_body", message);
intent.putExtra(Intent.EXTRA_STREAM, attachment);
if (intent.resolveActivity(getPackageManager()) != null) {
startActivity(intent);
}
}
/**
* 如果您想确保 Intent 只由短信应用(而非其他电子邮件或社交应用)进行处理,则需使用 ACTION_SENDTO 操作并加入 "smsto:" 数据架构。例如:
* @param message
* @param attachment
*/
public void composeMmsMessage(String message, Uri attachment) {
Intent intent = new Intent(Intent.ACTION_SEND);
intent.setData(Uri.parse("smsto:")); // This ensures only SMS apps respond
intent.putExtra("sms_body", message);
// intent.putExtra(Intent.EXTRA_STREAM, attachment);
if (intent.resolveActivity(getPackageManager()) != null) {
startActivity(intent);
}
}对应的xml:
<Button
    android:id="@+id/button_18"
    android:layout_width="wrap_content"
    android:layout_height="wrap_content"
    android:onClick="onClick"
    android:text="发送短信——带有附件的短信彩信" />
5.5.15 网络浏览
具体代码:
Intent intent = new Intent(Intent.ACTION_VIEW, webpage);过滤器:
<intent-filter>
        <action android:name="android.intent.action.VIEW" />
        <!-- Include the host attribute if you want your app to respond
             only to URLs with your app's domain. -->
        <data android:scheme="http" android:host="www.example.com" />
        <category android:name="android.intent.category.DEFAULT" />
        <!-- The BROWSABLE category is required to get links from web pages. -->
        <category android:name="android.intent.category.BROWSABLE" />
    </intent-filter>
完整代码:
case R.id.button_19:
    openWebPage("https://www.baidu.com/");
    break;
/**
* 操作
* ACTION_VIEW
* 数据 URI 架构
* http:<URL>
* https:<URL>
* MIME 类型
* "text/plain"
* "text/html"
* "application/xhtml+xml"
* "application/vnd.wap.xhtml+xml"
*
* @param url
*/
public void openWebPage(String url) {
Uri webpage = Uri.parse(url);
Intent intent = new Intent(Intent.ACTION_VIEW, webpage);
if (intent.resolveActivity(getPackageManager()) != null) {
startActivity(intent);
}
}对应的xml:
<Button
    android:id="@+id/button_19"
    android:layout_width="wrap_content"
    android:layout_height="wrap_content"
    android:onClick="onClick"
    android:text="网络浏览器——加载网址" />
android互助群:

转发标明出处 https://blog.csdn.net/qq_35698774/article/details/105966038
感谢:https://developer.android.google.cn/guide/components/intents-filters
感谢:https://www.jianshu.com/p/67d99a82509b