springcloud微服务学习(1)-关于Nacos和Feign
一、Spring Cloud和Spring Boot是什么关系
Spring Boot 是 Spring 的一套快速配置脚手架,可以基于Spring Boot 快速开发单个微服务,Spring Cloud是一个基于Spring Boot实现的开发工具;Spring Boot专注于快速、方便集成的单个微服务个体,Spring Cloud关注全局的服务治理框架; Spring Boot使用了默认大于配置的理念,很多集成方案已经帮你选择好了,能不配置就不配置,Spring Cloud很大的一部分是基于Spring Boot来实现,必须基于Spring Boot开发。可以单独使用Spring Boot开发项目,但是Spring Cloud离不开 Spring Boot。
二、Nacos(阿里巴巴管理微服务)
- Windows
启动命令:cmd startup.cmd 或者双击startup.cmd运行文件。
访问:http://localhost:8848/nacos
用户名密码:nacos/nacos
(1)在service模块配置pom
 		<dependency>
            <groupId>org.springframework.cloud</groupId>
            <artifactId>spring-cloud-starter-alibaba-nacos-discovery</artifactId>
            <version>0.2.2.RELEASE</version>
        </dependency>
(2)添加服务配置信息
#nacos服务地址
spring.cloud.nacos.discovery.server-addr=127.0.0.1:8848
(3)在客户端微服务启动类中添加注解
@EnableDiscoveryClient
(4)启动客户端微服务
启动各项微服务启动类后
打开http://localhost:8848/nacos查看服务列表
三、服务调用(Feign:在一个服务上启动另一个服务器)
(1)引入依赖
		<dependency>
            <groupId>org.springframework.cloud</groupId>
            <artifactId>spring-cloud-starter-openfeign</artifactId>
            <version>2.2.0.RELEASE</version>
        </dependency>
(2)同样在启动类上添加注解
@EnableFeignClients
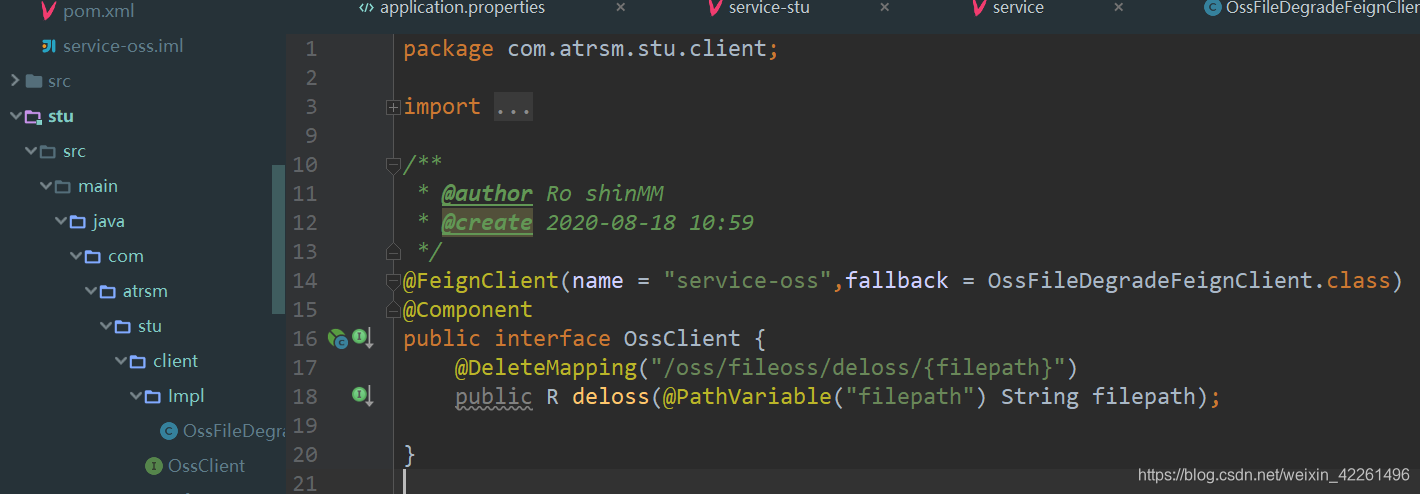
(3)在调用端创建client包和接口
四、其他注意事项
(1)针对Tomcat对于/转义为%2F的解决办法
在oss启动类中做如下修改,解决了swagger测试中“/”的问题
@EnableDiscoveryClient
@SpringBootApplication(exclude = DataSourceAutoConfiguration.class)
@ComponentScan("com.atrsm")
public class OssApplicationUtils extends WebMvcConfigurerAdapter {
    public static void main(String[] args) {
        System.setProperty("org.apache.tomcat.util.buf.UDecoder.ALLOW_ENCODED_SLASH","true");
        SpringApplication.run(OssApplicationUtils.class,args);
    }

    @Override
    public void configurePathMatch(PathMatchConfigurer configurer) {
        UrlPathHelper urlPathHelper = new UrlPathHelper();
        urlPathHelper.setUrlDecode(false);
        configurer.setUrlPathHelper(urlPathHelper);
    }
}
(2)在OssController层中
filepath = filepath.replaceAll("_","/");
(3)在StudentServiceImpl中
avatar= avatar.replaceAll("/","_");
//再调用ossService
R r = ossClient.deloss(avatar);
(4)注意在client中加上@component注解封装到bean中
版权声明:本文为weixin_42261496原创文章,遵循 CC 4.0 BY-SA 版权协议,转载请附上原文出处链接和本声明。