一、环境准备
1、前期准备
| 名称 | 说明 |
|---|---|
| centos | 7.x |
| libfastcommon | FastDFS分离出的一些公用函数包 |
| FastDFS | FastDFS本体 |
| fastdfs-nginx-module | FastDFS和nginx的关联模块 |
| nginx | nginx1.15.4 |
2、CentOS添加编译环境
yum install git gcc gcc-c++ make automake autoconf libtool pcre pcre-devel zlib zlib-devel openssl-devel wget vim -y
二、磁盘目录
mkdir -p /usr/local/soft #所有安装包目录
mkdir -p /data/fastdfs #数据存储位置
三、安装
1、安装libfastcommon
cd /usr/local/soft
git clone https://github.com/happyfish100/libfastcommon.git –depth 1
#如果git地址访问被拒绝用gitee码云地址
git clone https://gitee.com/fastdfs100/libfastcommon.git –depth 1
cd libfastcommon/
./make.sh && ./make.sh install #编译安装
2、安装FastDFS
cd /usr/local/soft
git clone https://github.com/happyfish100/fastdfs.git –depth 1
#如果git地址访问被拒绝用gitee码云地址
git clone https://gitee.com/fastdfs100/fastdfs.git
cd fastdfs/
./make.sh && ./make.sh install #编译安装
#供nginx访问使用
cp /usr/local/soft/fastdfs/conf/http.conf /etc/fdfs/
cp /usr/local/soft/fastdfs/conf/mime.types /etc/fdfs/
3、安装fastdfs-nginx-module
cd /usr/local/soft
git clone https://github.com/happyfish100/fastdfs-nginx-module.git –depth 1
#如果git地址访问被拒绝用gitee码云地址
git clone https://gitee.com/fastdfs100/fastdfs-nginx-module.git
cp /usr/local/soft/fastdfs-nginx-module/src/mod_fastdfs.conf /etc/fdfs
4、安装nginx
wget http://nginx.org/download/nginx-1.15.4.tar.gz #下载nginx压缩包
tar -zxvf nginx-1.15.4.tar.gz #解压
cd nginx-1.15.4/
#添加fastdfs-nginx-module模块
./configure –add-module=/usr/local/soft/fastdfs-nginx-module/src/
make && make install #编译安装
四、单机部署
1、修改linux hosts
服务器IP:192.168.47.135
vim /etc/hosts
192.168.47.135 fastdfs.com
2、tracker配置
vim /etc/fdfs/tracker.conf
#需要修改的内容
port=2212 #tracker服务器端口号(默认8888,一般不修改)
base_path=/data/fastdfs #存储数据和日志的根目录
3、storage配置
vim /etc/fdfs/storage.conf
#需要修改的内容
port=23000 # storage服务器端口号(默认23000,一般不修改)
base_path=/data/fastdfs #存储数据和日志的根目录
store_path0=/data/fastdfs # 第一个存储目录
tracker_server=fastdfs.com:22122 # tracker服务器Ip和端口
http.server_port=8888 # http访问文件的端口(默认8888,看情况修改,和nginx中保持一致)
4、启动服务
#关闭防火墙开机自启
systemctl disable firewalld.service
#关闭防火墙
systemctl stop firewalld.service
#启动tracker
/usr/bin/fdfs_trackerd /etc/fdfs/tracker.conf
#启动storage
/usr/bin/fdfs_storaged /etc/fdfs/storage.conf
#重启storage
/usr/bin/fdfs_storaged /etc/fdfs/storage.conf restart
5、Client测试
vim /etc/fdfs/client.conf
#需要修改的内容
base_path=/data/fastdfs
tracker_server=fastdfs.com:22122 #tracker服务器IP和端口
#保存成功后测试,返回Id表示成功:group1/M00/00/00/wKiWgGLFnvGAQxFaAABMAsc2ezc167.jpg
#上传文件
fdfs_upload_file /etc/fdfs/client.conf /usr/local/soft/a.jpg
#删除文件
fdfs_delete_file /etc/fdfs/client.conf group1/M00/00/00/wKiWgGLFnvGAQxFaAABMAsc2ezc167.jpg
5、配置nginx访问(相当于Client)
mkdir -p /data/nginx/ #配置nginx日志目录
vim /etc/fdfs/mod_fastdfs.conf
base_path=/data/nginx/
tracker_server=fastdfs.com:22122
url_have_group_name = true
store_path0=/data/fastdfs
配置nginx.config
vim /usr/local/nginx/conf/nginx.conf
#添加如下配置
server {
listen 8888; # 该端口和storage.conf中的http.server_port保持相同
server_name localhost;
location ~/group[0-9]/ {
ngx_fastdfs_module;
}
error_page 500 502 503 504 /50x.html;
location = /50x.html {
root html;
}
}
注意:上面打空格时不能用tab键,只能用space空格键,不然报错 unknown directive ” ” in /usr/local/nginx/conf/nginx.conf:41
启动nginx
/usr/local/nginx/sbin/nginx #启动nginx
/usr/local/nginx/sbin/nginx -s reload # 重启nginx
/usr/local/nginx/sbin/nginx -s stop #停止nginx
测试
配置window hosts
192.168.47.135 fastdfs.com
地址:http://fastdfs.com:8888/group1/M00/00/00/wKiWgGLFnvGAQxFaAABMAsc2ezc167.jpg
五、集群部署
以下机器都是由192.168.47.135机器克隆而来,所以前期准备就不需要了,直接配置
1、修改linux hosts
服务器IP 192.168.47.136 192.168.47.137
vim /etc/hosts
两台机器分别配置
192.168.47.136 fastdfs2.com
192.168.47.137 fastdfs3.com
2、tracker配置
vim /etc/fdfs/tracker.conf
#需要修改的内容
port=2212 #tracker服务器端口号(默认8888,一般不修改)
base_path=/data/fastdfs #存储数据和日志的根目录
3、storage配置
vim /etc/fdfs/storage.conf
#需要修改的内容
port=23000 # storage服务器端口号(默认23000,一般不修改)
base_path=/data/fastdfs #存储数据和日志的根目录
store_path0=/data/fastdfs # 第一个存储目录
#配置多个tracker
tracker_server=fastdfs2.com:22122 # tracker服务器Ip和端口
tracker_server=fastdfs3.com:22122 # tracker服务器Ip和端口
http.server_port=8888 # http访问文件的端口(默认8888,看情况修改,和nginx中保持一致)
4、启动服务
#永久关闭防火墙
systemctl disable firewalld.service
#启动tracker
/usr/bin/fdfs_trackerd /etc/fdfs/tracker.conf
#启动storage
/usr/bin/fdfs_storaged /etc/fdfs/storage.conf
#重启storage
/usr/bin/fdfs_storaged /etc/fdfs/storage.conf restart
#停止
/usr/bin/fdfs_trackerd /etc/fdfs/tracker.conf stop
/usr/bin/fdfs_storaged /etc/fdfs/storage.conf stop
5、Client测试
vim /etc/fdfs/client.conf
#需要修改的内容
base_path=/data/fastdfs
tracker_server=fastdfs2.com:22122 #tracker服务器IP和端口
tracker_server=fastdfs3.com:22122
#保存成功后测试,返回Id表示成功:group1/M00/00/00/wKiWgGLFnvGAQxFaAABMAsc2ezc167.jpg
#上传文件
fdfs_upload_file /etc/fdfs/client.conf /usr/local/soft/a.jpg
#删除文件
fdfs_delete_file /etc/fdfs/client.conf group1/M00/00/00/wKiWgGLFnvGAQxFaAABMAsc2ezc167.jpg
6、配置nginx访问(相当于Client)
mkdir -p /data/nginx/ #配置nginx日志目录
vim /etc/fdfs/mod_fastdfs.conf
base_path=/data/nginx/
tracker_server=fastdfs2.com:22122
tracker_server=fastdfs2.com:22122
url_have_group_name = true
store_path0=/data/fastdfs
配置nginx.config
vim /usr/local/nginx/conf/nginx.conf
#添加如下配置
server {
listen 8888; # 该端口和storage.conf中的http.server_port保持相同
server_name localhost;
location ~/group[0-9]/ {
ngx_fastdfs_module;
}
error_page 500 502 503 504 /50x.html;
location = /50x.html {
root html;
}
}
地址:http://fastdfs2.com:8888/group1/M00/00/00/wKiWgGLFnvGAQxFaAABMAsc2ezc167.jpg
地址:http://fastdfs3.com:8888/group1/M00/00/00/wKiWgGLFnvGAQxFaAABMAsc2ezc167.jpg
检测集群
/usr/bin/fdfs_monitor /etc/fdfs/storage.conf
六、SpringBoot集成fastdfs-client-java
官网地址:https://github.com/happyfish100/fastdfs-client-java
1、fastdfs-client-java官方示例
1、引入依赖,需要按照官网提示手动编译后引入
<dependency>
    <groupId>org.csource</groupId>
    <artifactId>fastdfs-client-java</artifactId>
    <version>1.29-SNAPSHOT</version>
</dependency>
2、在resources根目录下新建fdfs_client.conf配置文件
tracker_server = 192.168.150.129:22122
3、下载文件,新建Download.java
package cn.itcloud.fastdfs.demo;

import org.csource.common.MyException;
import org.csource.fastdfs.ClientGlobal;
import org.csource.fastdfs.StorageClient;
import org.csource.fastdfs.TrackerClient;
import org.csource.fastdfs.TrackerServer;

import java.io.File;
import java.io.IOException;

/**
 * @author zqing
 * @description: TODO
 * @date: 2022/7/10 16:07
 */
public class Download {

    public static void main(String[] args) {

        try {
            //1、加载配置文件 tracker(ip:port)
            ClientGlobal.init("fdfs_client.conf");
            //2、创建TrackerClient对象
            TrackerClient trackerClient = new TrackerClient();
            //3、使用TrackerClient对象获取trackerserver对象
            TrackerServer trackerServer = trackerClient.getTrackerServer();
            //4、创建StorageClient对象
            StorageClient storageClient = new StorageClient(trackerServer);
            //5、图片存放路径以及名称
            String path = System.getProperty("user.dir")+ File.separator+"a.jpg";
            //6、使用StorageClient对象下载文件
            storageClient.download_file("group1","M00/00/00/wKiWgmLIPVCAevMWAABMAsc2ezc842.jpg",path);
        } catch (IOException e) {
            e.printStackTrace();
        } catch (MyException e) {
            e.printStackTrace();
        }
    }

}
4、运行看结果
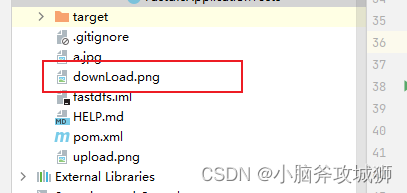
会在项目的根目录下,生成a.jpg
5、上传文件
package cn.itcloud.fastdfs.demo;

import org.csource.common.MyException;
import org.csource.fastdfs.ClientGlobal;
import org.csource.fastdfs.StorageClient;
import org.csource.fastdfs.TrackerClient;
import org.csource.fastdfs.TrackerServer;

import java.io.File;
import java.io.IOException;

/**
 * @author zqing
 * @description: TODO
 * @date: 2022/7/10 16:28
 */
public class Upload {

    public static void main(String[] args) throws MyException, IOException {

        //1、加载配置文件 tracker(ip:port)
        ClientGlobal.init("fdfs_client.conf");
        //2、创建TrackerClient对象
        TrackerClient trackerClient = new TrackerClient();
        //3、使用TrackerClient对象获取trackerserver对象
        TrackerServer trackerServer = trackerClient.getTrackerServer();
        //4、创建StorageClient对象,trackerServer、storageServer两个参数
        StorageClient storageClient = new StorageClient(trackerServer);
        //5、图片存放路径以及名称
        String path = System.getProperty("user.dir")+ File.separator+"upload.png";
        //6、使用StorageClient对象上传文件
        String[] strings = storageClient.upload_file(path, "png", null);
        //打印上传后的路径
        for (String s: strings) {
            System.out.println(s);
        }
    }

}
其中upload.png需要提前放在项目的根目录下。
6、上传结果打印
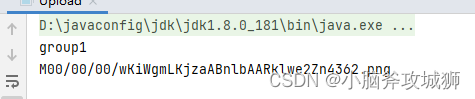
http://fastdfs3.com:8888/group1/M00/00/00/wKiWgmLKjzaABnlbAARklwe2Zn4362.png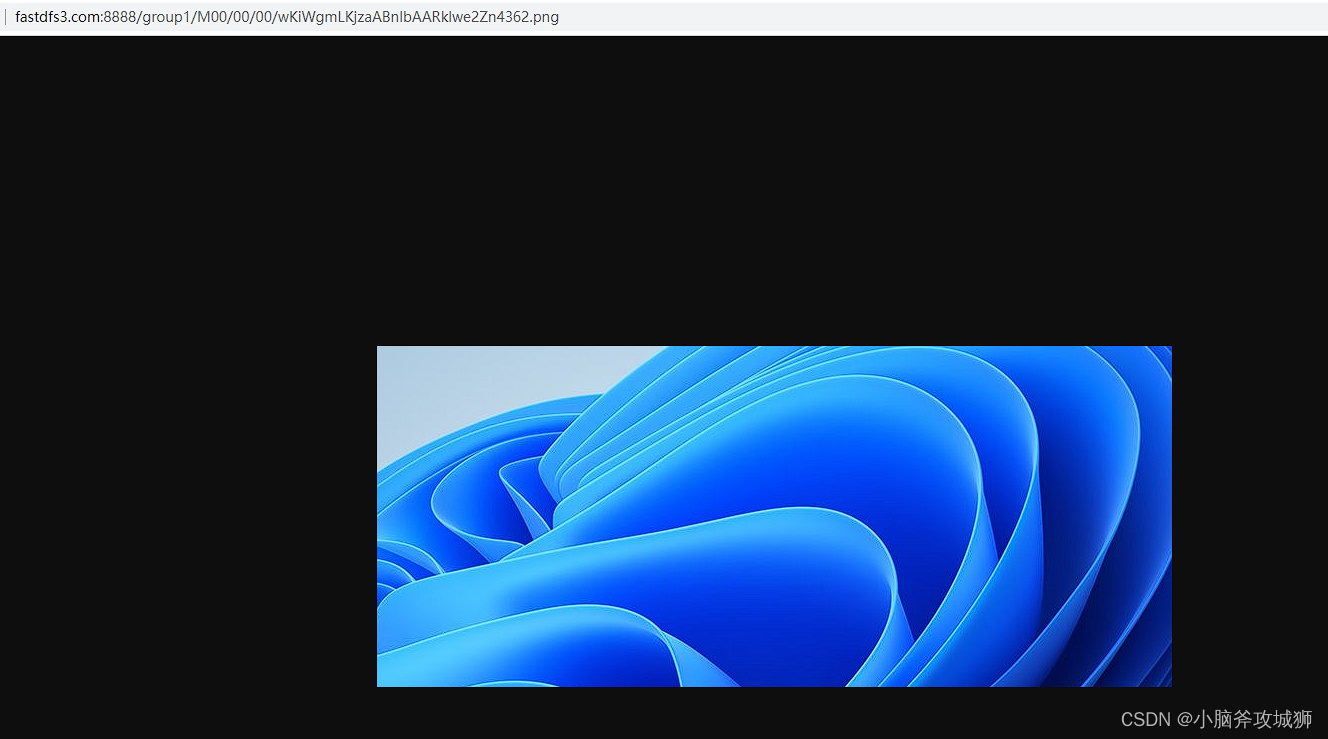
2、FastDFS-Client
在原作者YuQing与yuqih发布的java客户端基础上进行了大量重构工作,便于Java工作者学习与阅读。
当前客户端单元测试全部通过,服务端版本是FastDFS_V5.07
主要特性
- 对关键部分代码加入了单元测试,便于理解与服务端的接口交易,提高接口质量
- 将以前对byte硬解析风格重构为使用 对象+注解 的形式,尽量增强了代码的可读性
- 支持对服务端的连接池管理(commons-pool2)
- 支持上传图片时候检查图片格式,并且自动生成缩略图
- 在SpringBoot当中自动导入依赖
地址:https://github.com/tobato/FastDFS_Client
1、引入依赖
<dependency>
    <groupId>com.github.tobato</groupId>
    <artifactId>fastdfs-client</artifactId>
    <version>1.27.2</version>
</dependency>
2、application.yml
# ===================================================================
# 分布式文件系统FDFS配置
# ===================================================================
fdfs:
  so-timeout: 1500
  connect-timeout: 600
  thumb-image:             #缩略图生成参数
    width: 150
    height: 150
  tracker-list:            #TrackerList参数,支持多个
    - 192.168.150.129:22122
    - 192.168.150.130:22122
  #连接池
  pool:
    #从池中借出的对象的最大数目(配置为-1表示不限制)
    max-total: -1
    #获取连接时的最大等待毫秒数(默认配置为5秒)
    max-wait-millis: 5000
    #每个key最大连接数
    max-total-per-key: 50
    #每个key对应的连接池最大空闲连接数
    max-idle-per-key: 10
    #每个key对应的连接池最小空闲连接数
    min-idle-per-key: 5

upload: #自定义Url,方便测试
  base-url: http://fastdfs2.com:8888/
3、static中新建一个上传页面upload.html
<!DOCTYPE html>
<html lang="en">
<head>
    <meta charset="UTF-8">
    <title>Title</title>
</head>
<body>
<h1>文件上传测试</h1>
<form method="post" enctype="multipart/form-data" action="/upload">
    <input type="file" name="file"/>
    <input type="submit" value="上传">
</form>
</body>
</html>
4、UploadService.java
package cn.itcloud.fastdfs.service;

import com.github.tobato.fastdfs.domain.fdfs.StorePath;
import com.github.tobato.fastdfs.service.FastFileStorageClient;
import lombok.extern.slf4j.Slf4j;
import org.apache.commons.lang3.StringUtils;
import org.springframework.beans.factory.annotation.Autowired;
import org.springframework.beans.factory.annotation.Value;
import org.springframework.stereotype.Service;
import org.springframework.web.multipart.MultipartFile;

import javax.imageio.ImageIO;
import java.awt.image.BufferedImage;
import java.io.IOException;

/**
 * @author zqing
 * @description: TODO
 * @date: 2022/7/10 17:13
 */
@Service
@Slf4j
public class UploadService {

    @Autowired
    private FastFileStorageClient fastFileStorageClient;

    @Value("${upload.base-url}")
    private String baseUrl;

    public String uploadImage(MultipartFile file) {
        try {
            BufferedImage image = ImageIO.read(file.getInputStream());
            if (image == null || image.getWidth() == 0 || image.getHeight() == 0) {
                throw new RuntimeException("上传的文件不是图片");
            }
        } catch (IOException e) {
            log.error("校验文件内容失败...{}", e);
            throw new RuntimeException("校验文件内容失败..." + e.getMessage());
        }

        try {
            //获取文件扩展名称
            String extension = StringUtils.substringAfterLast(file.getOriginalFilename(), ".");
            //上传文件并且生成略缩图
            StorePath storePath = fastFileStorageClient.uploadImageAndCrtThumbImage(file.getInputStream(), file.getSize(), extension, null);
            //返回路径
            return baseUrl+storePath.getFullPath();
        } catch (IOException e) {
            log.error("上传文件失败...{}",e);
            throw new RuntimeException("上传文件失败..." + e.getMessage());
        }
    }

}
5、UploadController.java
package cn.itcloud.fastdfs.controller;

import cn.itcloud.fastdfs.service.UploadService;
import org.springframework.beans.factory.annotation.Autowired;
import org.springframework.web.bind.annotation.RequestMapping;
import org.springframework.web.bind.annotation.RestController;
import org.springframework.web.multipart.MultipartFile;

import java.util.HashMap;
import java.util.Map;

/**
 * @author zqing
 * @description: TODO
 * @date: 2022/7/10 17:11
 */
@RestController
public class UploadController {

    @Autowired
    private UploadService uploadService;

    @RequestMapping("/upload")
    public Map<String,Object> upload(MultipartFile file){
        Map<String,Object> map = new HashMap<>();
        String path = uploadService.uploadImage(file);
        map.put("path",path);
        return map;
    }

}
6、访问http://localhost:8080/upload.html

7、上传文件
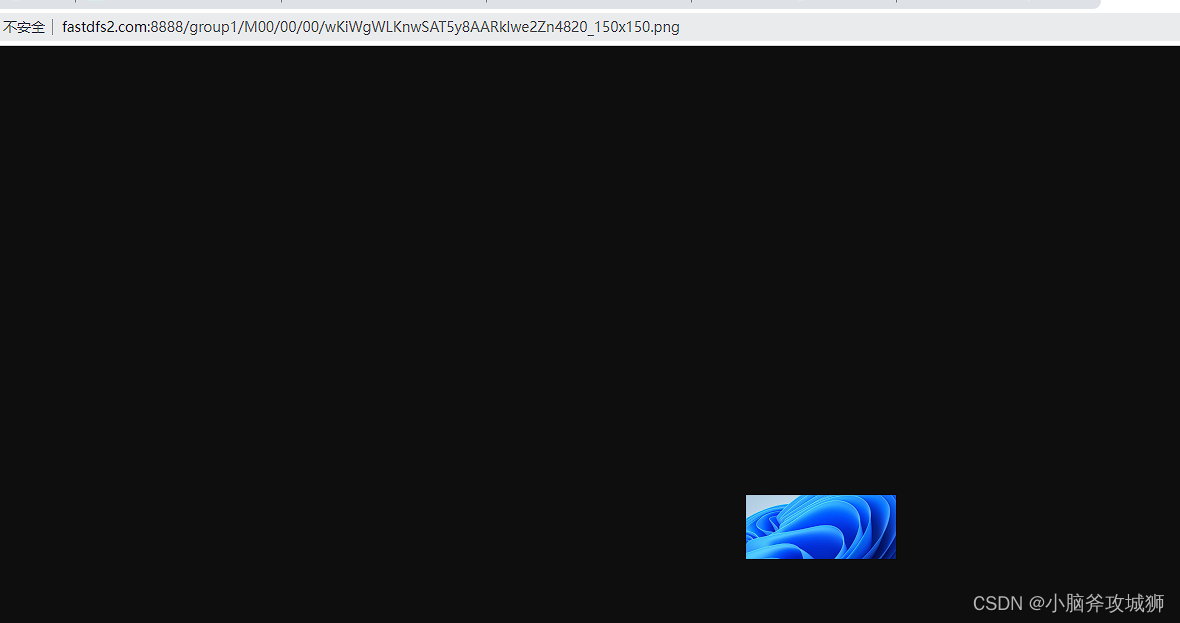
上传成功后鼠标放上去可以看到图片,这个效果是json插件效果,没有的话,直接访问返回的地址就行

略缩图 http://fastdfs2.com:8888/group1/M00/00/00/wKiWgWLKnwSAT5y8AARklwe2Zn4820_150x150.png
8、文件下载和删除
package cn.itcloud.fastdfs;

import com.github.tobato.fastdfs.domain.proto.storage.DownloadByteArray;
import com.github.tobato.fastdfs.service.FastFileStorageClient;
import org.csource.fastdfs.StorageClient;
import org.junit.jupiter.api.Test;
import org.springframework.beans.factory.annotation.Autowired;
import org.springframework.boot.test.context.SpringBootTest;

import java.io.FileNotFoundException;
import java.io.FileOutputStream;
import java.io.IOException;

@SpringBootTest
class FastdfsApplicationTests {

    @Autowired
    private FastFileStorageClient fastFileStorageClient;

    /**
     * 测试文件下载
     */
    @Test
    void downLoad() {
        try {
            byte[] bytes = fastFileStorageClient.downloadFile("group1", "M00/00/00/wKiWgWLKnwSAT5y8AARklwe2Zn4820_150x150.png", new DownloadByteArray());
            FileOutputStream stream = new FileOutputStream("downLoad.png");
            stream.write(bytes);
        } catch (IOException e) {
            e.printStackTrace();
        }
    }

    /**
     * 文件删除
     */
    @Test
    void delete(){
        fastFileStorageClient.deleteFile("group1/M00/00/00/wKiWgWLKnwSAT5y8AARklwe2Zn4820_150x150.png");
    }


}
9、下载以及删除结果