基于上一篇:CentOS7.3安装Apache2.4+MySQL5.7+PHP7.1过程记录 的环境基础上,搭建NextCloud进行中,不管是否成功都把过程记录下来先。
一、配置MySQL数据库
# 使用 root 用户登录 MySQL
[root@localhost ~]# mysql -u root -p
Enter password:
Welcome to the MySQL monitor. Commands end with ; or \g.
Your MySQL connection id is 2
Server version: 5.7.22 MySQL Community Server (GPL)
Copyright (c) 2000, 2018, Oracle and/or its affiliates. All rights reserved.
Oracle is a registered trademark of Oracle Corporation and/or its
affiliates. Other names may be trademarks of their respective
owners.
Type ‘help;’ or ‘\h’ for help. Type ‘\c’ to clear the current input statement.
mysql>
# 修改 MySQL 配置文件
vim /etc/my.cnf
# 修改默认编码为 UTF-8,添加在 [mysqld] 后
character_set_server = utf8
init_connect = ‘SET NAMES utf8’
# 进入编辑my.cnf配置文件
[root@localhost sgtfz]# vim /etc/my.cnf
# 已进入my.cnf配置文件,下面是已经修改好的内容
# For advice on how to change settings please see
# http://dev.mysql.com/doc/refman/5.7/en/server-configuration-defaults.html
[mysqld]
character_set_server = utf8
init_connect = ‘SET NAMES utf8’
#
# Remove leading # and set to the amount of RAM for the most important data
# cache in MySQL. Start at 70% of total RAM for dedicated server, else 10%.
# innodb_buffer_pool_size = 128M
#
# Remove leading # to turn on a very important data integrity option: logging
# changes to the binary log between backups.
# log_bin
#
# Remove leading # to set options mainly useful for reporting servers.
# The server defaults are faster for transactions and fast SELECTs.
# Adjust sizes as needed, experiment to find the optimal values.
# join_buffer_size = 128M
# sort_buffer_size = 2M
# read_rnd_buffer_size = 2M
datadir=/var/lib/mysql
socket=/var/lib/mysql/mysql.sock
# Disabling symbolic-links is recommended to prevent assorted security risks
symbolic-links=0
log-error=/var/log/mysqld.log
pid-file=/var/run/mysqld/mysqld.pid
# 编辑好之后保存退出
# 使用 root 用户登录 MySQL
[root@localhost sgtfz]# mysql -u root -p
Enter password:
Welcome to the MySQL monitor. Commands end with ; or \g.
Your MySQL connection id is 3
Server version: 5.7.22 MySQL Community Server (GPL)
Copyright (c) 2000, 2018, Oracle and/or its affiliates. All rights reserved.
Oracle is a registered trademark of Oracle Corporation and/or its
affiliates. Other names may be trademarks of their respective
owners.
Type ‘help;’ or ‘\h’ for help. Type ‘\c’ to clear the current input statement.
# 创建 nextcloud 数据库
mysql> create database nextcloud;
Query OK, 1 row affected (0.01 sec)
# 创建 nextcloud_user 用户
mysql> create user ‘nextcloud_user’@’localhost’ identified by ‘密码’;
Query OK, 0 rows affected (0.00 sec)
# 给 nextcloud_user 用户授权 nextcloud 数据库的所有权限
mysql> grant all on nextcloud.* to ‘nextcloud_user’@’localhost’;
Query OK, 0 rows affected (0.00 sec)
# 刷新权限(将当前 user 和 privilige 表中的用户信息/权限设置从 mysql 库提取到内存中)
mysql> flush privileges;
Query OK, 0 rows affected (0.00 sec)
# 退出 MySQL
mysql> \q
二、部署Nextcloud
# 移动到 Apache 部署目录,这一步我漏了
cd /var/www/html
# 下载 Nextcloud 服务端
[root@localhost sgtfz]# wget https://download.nextcloud.com/server/releases/nextcloud-13.0.2.zip
–2018-05-28 00:11:58– https://download.nextcloud.com/server/releases/nextcloud-13.0.2.zip
正在解析主机 download.nextcloud.com (download.nextcloud.com)… 88.198.160.133
正在连接 download.nextcloud.com (download.nextcloud.com)|88.198.160.133|:443… 已连接。
已发出 HTTP 请求,正在等待回应… 200 OK
长度:61108941 (58M) [application/zip]
正在保存至: “nextcloud-13.0.2.zip”
100%[============================================>] 61,108,941 30.0KB/s 用时 22m 32s
2018-05-28 00:34:32 (44.1 KB/s) – 已保存 “nextcloud-13.0.2.zip” [61108941/61108941])
# 移动已下载好的nextcloud-13.0.2.zip到/var/www/html目录
[root@localhost sgtfz]# mv nextcloud-13.0.2.zip /var/www/html
# 转到/var/www/html目录
[root@localhost sgtfz]# cd /var/www/html
# 解压nextcloud服务端压缩包
[root@localhost html]# unzip nextcloud-13.0.2.zip
# 如果没有解压程序,安装 unzip 解压程序
yum -y install unzip
# 赋予目录权限(R: 递归)
[root@localhost html]# chmod -R 777 nextcloud
# 永久关闭 SELinux(需重启)如果没有关闭SELinux,浏览器访问 IP/nextcloud 会造成“内部服务器错误”
[root@localhost html]# sed -i ‘/SELINUX/s/enforcing/disabled/’ /etc/selinux/config
# 重启CentOS主机,稍后继续下一步。
没有关闭SELinux的结果如下图:
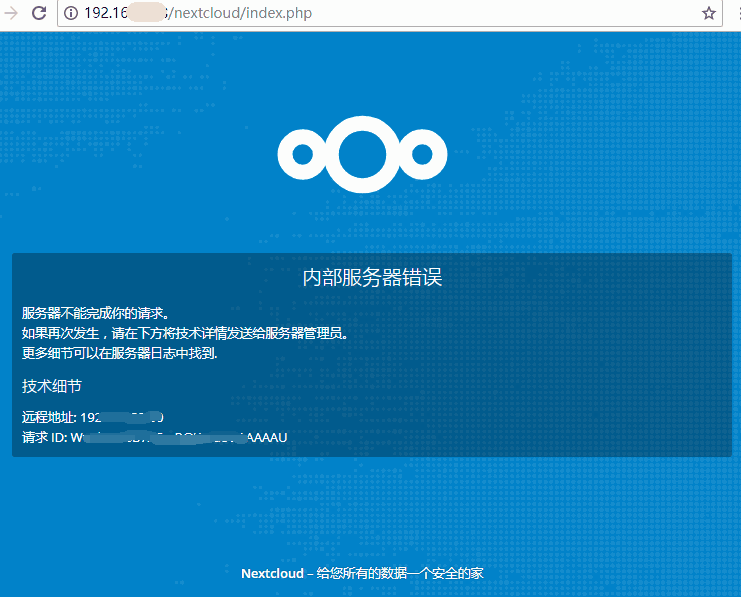
关闭SELinux,然后重启CentOS服务器主机后,正常了。

按步骤创建管理员账户,点击安装完成
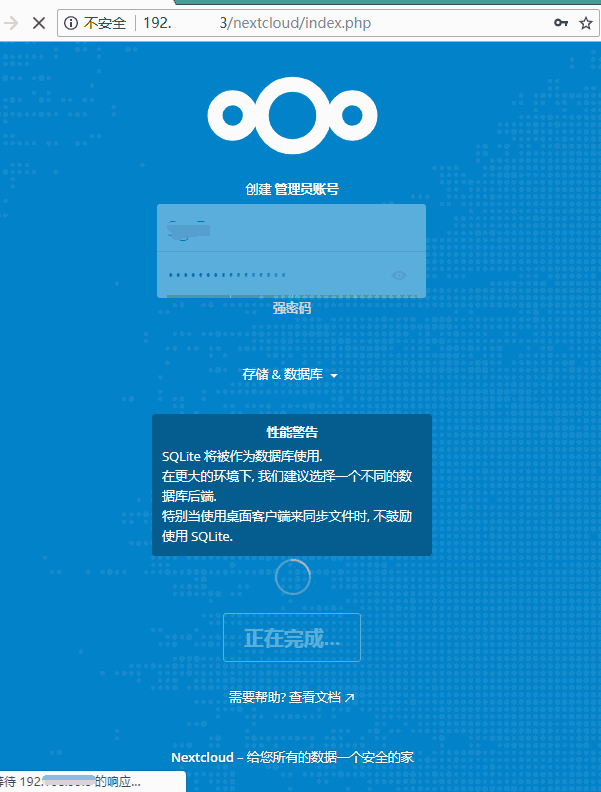
这里我忘了,默认使用的是SQLite作为数据库使用,强烈不推荐。所以我们使用MySQL如下图
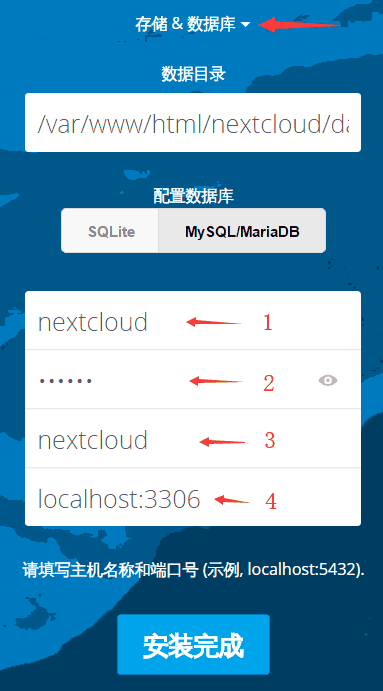
1.数据库用户名
2.数据库密码
3.数据库名称
4.数据库地址(数据库的IP,如果是本机,可以写127.0.0.1,也可以写localhost)
最后再点击完成。
稍等片刻,就进入我们的私有云啦!!
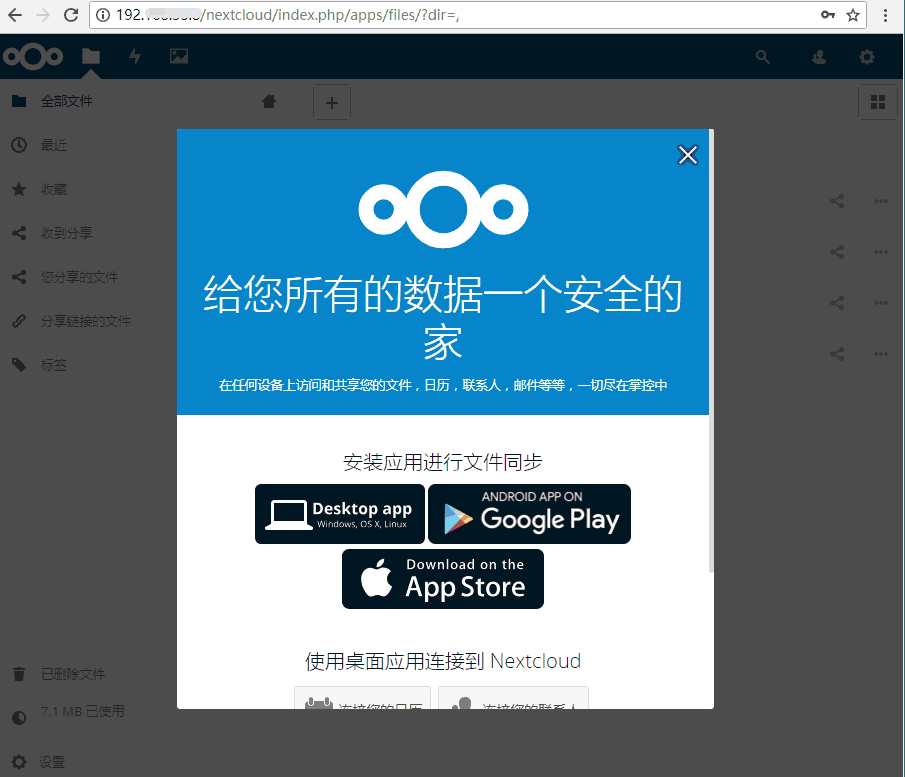
接下来怎么使用这个nextcloud私有云,就以后再慢慢去体验与发现了😪