今天与大家分享springboot自动装配的案例。如果哪里有问题,望指教。
目录
2.5 EnableConfigurationProperties
5.3.3 HelloServiceAutoConfigration
1. 作用
为了简化配置,使spring的使用更加方便,例如:可以回忆一下springboot中是如何继承redis的。
spring配置方式的进化过程:
- xml的方式配置
- java config的方式配置,使用@configuration注解在java中配置
- 自动装配
springboot starter作用:
- 引入模块所需的相关jar包
- 自动配置各自模块所需的属性
使用springboot后集成常用的第三方框架变得非常简单了。
springboot starter带来的问题
starter使SpringBoot集成第三方框架变得简单,但对刚刚上手SpringBoot的人来说,可能只知道配置属性是在application.xml或application.yml中添加,但他们各自的属性都有哪些,具体怎么配置,却无从下手
2. 注解
自动装配相关的注解示例:
2.1 元注解
为更好的理解装配过程,复习一下元注解。
- @Target: 自定义注解的使用范围,比如类,方法,属性等
- @Retention: 保留策略,如源码中保存(@Override),class中保存(@SupperWarning),运行时保存等
- @Docmented: 为javadoc使用的。
- @Inherited: 被其修饰的自定义注解可以被子类继承
2.2 @Import
作用:为容器导入bean的定义
常用的三种方式:
1) @Import(value={A.class}) 将A类导入容器中,交给IOC管理
2) @Import(value={XxxImportBeanDefinitionRegister.class}) 也是将bean导入容器中,与上面不同的是实现了ImportBeanDefinitionRegistrar接口,该接口用来动态注册bean
3) @Import(value={XxxImportSelector.class}) 可以批量导入,需要实现ImportSelector接口,该接口返回一个数组(需要注册的bean的全路径),实现批量注册。
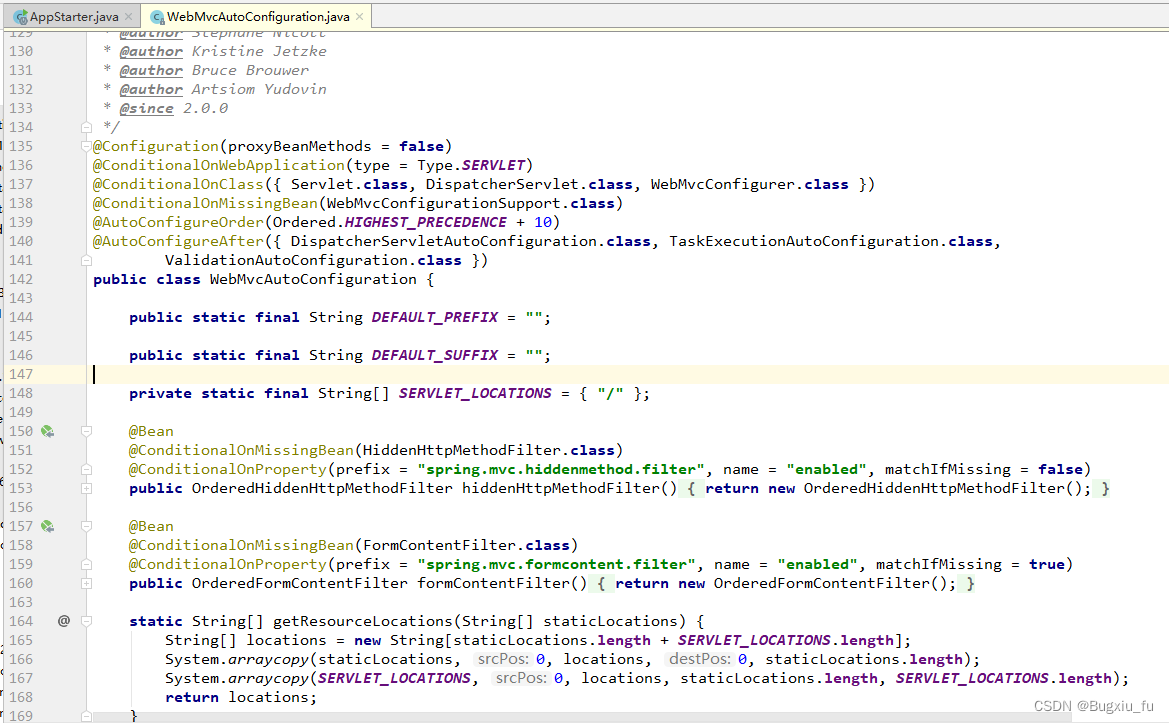
2.3 @Configuration
被挂上@Configuration注解,表明它是一个配置类,作用等同于xml配置,里面有被@Bean注解的方法,也等同于xml配置的各种<bean>
2.4 @ConditionalXXX
- @ConditionalOnBean,仅在当前上下文中存在某个bean时,才会实例化这个Bean
- @ConditionalOnClass,某个class位于类路径上,才会实例化这个Bean
- @ConditionalOnExpression,当表达式为true的时候,才会实例化这个Bean
- @ConditionalOnMissingBean,仅在当前上下文中不存在某个bean时,才会实例化这个Bean
- @ConditionalOnMissingClass,某个class在类路径上不存在的时候,才会实例化这个Bean
- @ConditionalOnNotWebApplication,不是web应用时才会实例化这个Bean
- @AutoConfigureAfter,在某个bean完成自动配置后实例化这个bean
- @AutoConfigureBefore,在某个bean完成自动配置前实例化这个bean
2.5 EnableConfigurationProperties
作用就是将@ConfigurationProperties修饰的Bean加入到IOC容器中。@ConfigurationProperties与@EnableConfigurationProperties注解结合,可以方便的读取配置文件。
3. 配置文件
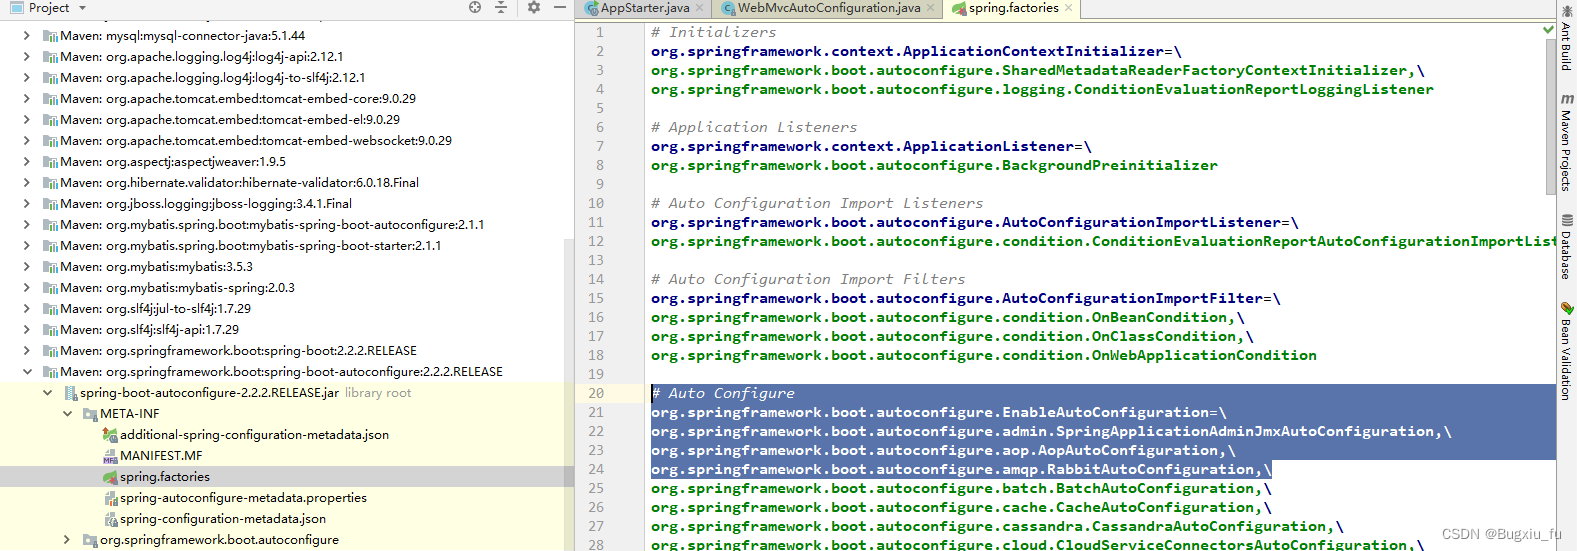
META-INF/spring.factories
如:
4. 结构
4.1 启动器
一个空的jar包,提供依赖管理。这些依赖可能用于自动装配或其他的第三方jar
命名规范:
spring官方的start: spring-boot-starter-xxx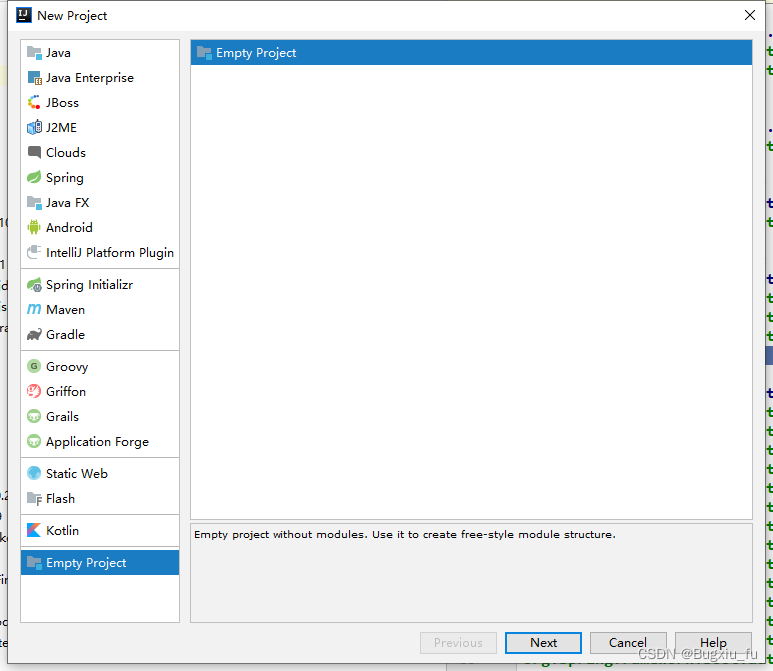
自定义的start: xxx-spring-boot-starter
4.2 自动配置
编写一个自动配置的模块,用于完成自动配置, 上一步的启动器依赖于自动配置, 用户在使用时自需引入启动器模块,即可自动导入自动配置模块。
5. 开发示例
5.1 创建工程
创建一个空工程,在该工程中创建两个模块,一个为start模块(启动类),一个为自动配置模块。
创建一个名为:springbootstartdemo的空项目

5.2 创建模块
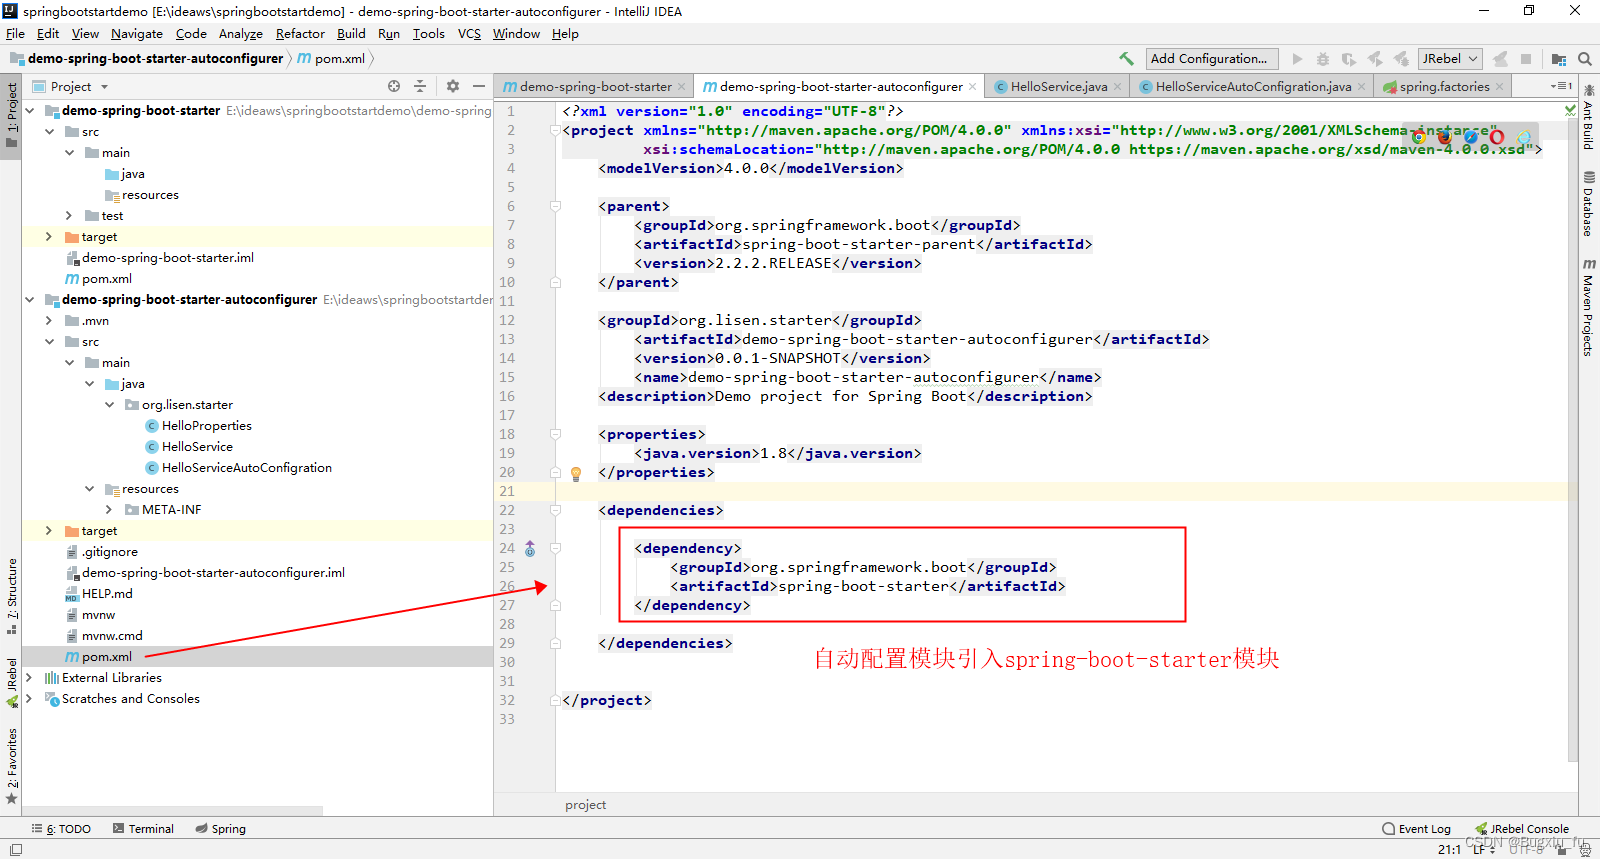
启动模块只需要导入自动配置模块,所以不需要集成springboot父项目。 自动配置模块需要依赖一spring-boot-start(Spring Boot核心starter,包含自动配置、日志、yal配置文件支持),所以需要spring-boot-starter-parent为父项目。
一个为start模块,启动模块,不需要做任何开发,只用在pom.xml配置文件中导入自动配置模块。使用者通过导入启动模块,启动模块导入自动配置模块,(可以将start启动模块想象成使用导火索)
请注意上面提到的命名规范。
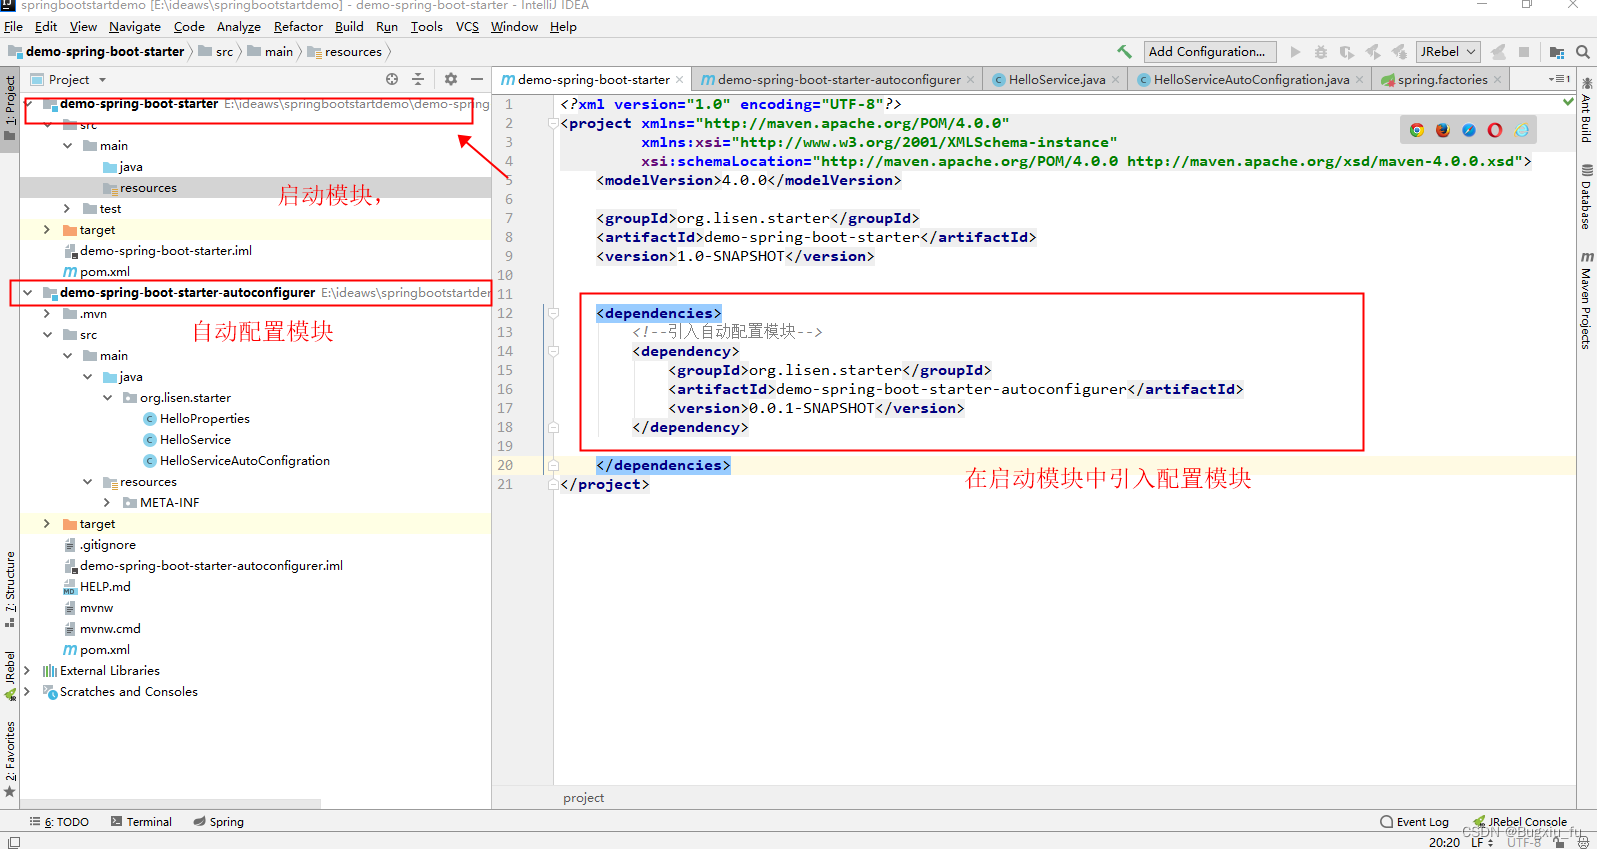
自动配置模块
5.3 开发自动配置模块
启动类的作用是导入自动配置模块,并不要进行编码开发
在自动配置模块如下:
5.3.1 HelloProperties
该类的作用时读取项目的配置文件, 使用@ConfigurationProperties注解,并指定读取demo.starter前缀的配置文件。
@ConfigurationProperties(prefix = "demo.starter")
public class HelloProperties {

    //greeting问候
    private String greeting;

    public String getGreeting() {
        return greeting;
    }

    public void setGreeting(String greeting) {
        this.greeting = greeting;
    }
}
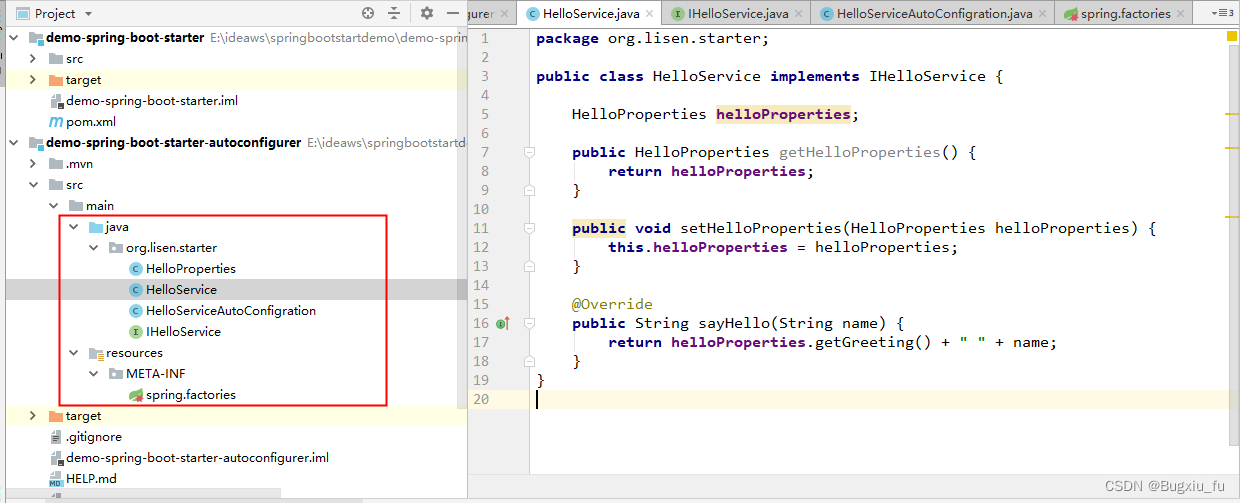
5.3.2 HelloService
该类用于通过传入的参数,与配置文件中的配置,组成一个字符串返回, 没有业务意义,仅用于演示spring start的运行原理。
public class HelloService implements IHelloService {

    HelloProperties helloProperties;

    public HelloProperties getHelloProperties() {
        return helloProperties;
    }

    public void setHelloProperties(HelloProperties helloProperties) {
        this.helloProperties = helloProperties;
    }

    @Override
    public String sayHello(String name) {
        return helloProperties.getGreeting() + " " + name;
    }
}
5.3.3 HelloServiceAutoConfigration
该类用于进行自动配置
@Configuration  //表明该类为配置类
@ConditionalOnWebApplication  //指定该配置类在web环境下有效
@EnableConfigurationProperties(HelloProperties.class)
public class HelloServiceAutoConfigration {

    @Autowired
    HelloProperties helloProperties;

    @Bean
    public HelloService helloService() {
        HelloService helloService = new HelloService();
        helloService.setHelloProperties(helloProperties);
        return helloService;
    }

}
5.3.4 spring.factories
编写spring.factories, 可以参mybatis-spring-boot-autoconfigure编写
# Auto Configure
org.springframework.boot.autoconfigure.EnableAutoConfiguration=\
org.mybatis.spring.boot.autoconfigure.MybatisLanguageDriverAutoConfiguration,\
org.mybatis.spring.boot.autoconfigure.MybatisAutoConfiguration
具体配置
# Auto Configure
org.springframework.boot.autoconfigure.EnableAutoConfiguration=\
org.lisen.starter.HelloServiceAutoConfigration
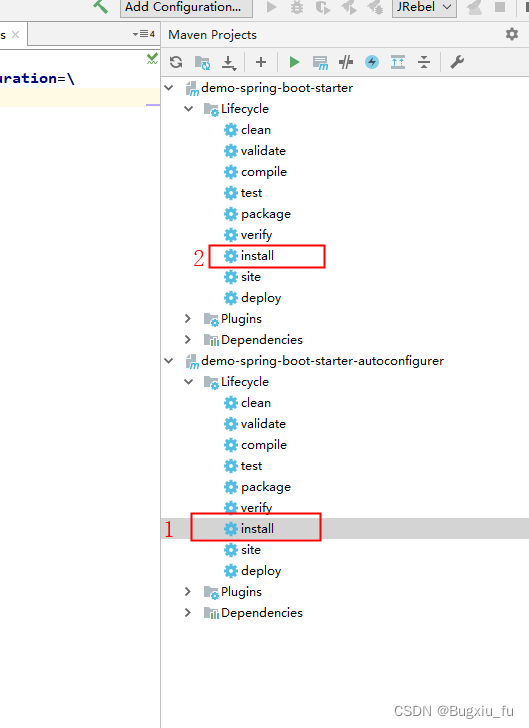
5.3.5 安装到本地仓库
将工程安装到本地仓库,以便于其他的工程使用。
因为启动模块需要依赖与自动配置模块,所以先安装自动配置模块,再安装启动模块。
到此为止一个自动装配模块就开发完成,下面看看如何使用。
6. 使用自动装配模块
创建一个springboot项目,并在pom.xml中引入上面的自动配置模块(只需引入启动类,启动类自动引入配置模块)。
pom.xml
    <parent>
        <groupId>org.springframework.boot</groupId>
        <artifactId>spring-boot-starter-parent</artifactId>
        <version>2.2.2.RELEASE</version>
    </parent>


    <properties>
        <java.version>1.8</java.version>
        <mysql.driver.version>5.1.44</mysql.driver.version>
    </properties>

    <dependencies>

        <dependency>
            <groupId>org.springframework.boot</groupId>
            <artifactId>spring-boot-starter-web</artifactId>
        </dependency>

        <dependency>
            <groupId>org.lisen.starter</groupId>
            <artifactId>demo-spring-boot-starter</artifactId>
            <version>1.0-SNAPSHOT</version>
        </dependency>
    </dependencies>
项目配置文件: application.properties
server.port=8080
server.servlet.context-path=/
server.tomcat.uri-encoding=utf-8

demo.starter.greeting=hello
启动类:
@SpringBootApplication
public class AppStarter {

    public static void main(String[] args) {

        SpringApplication.run(AppStarter.class, args);

    }

}
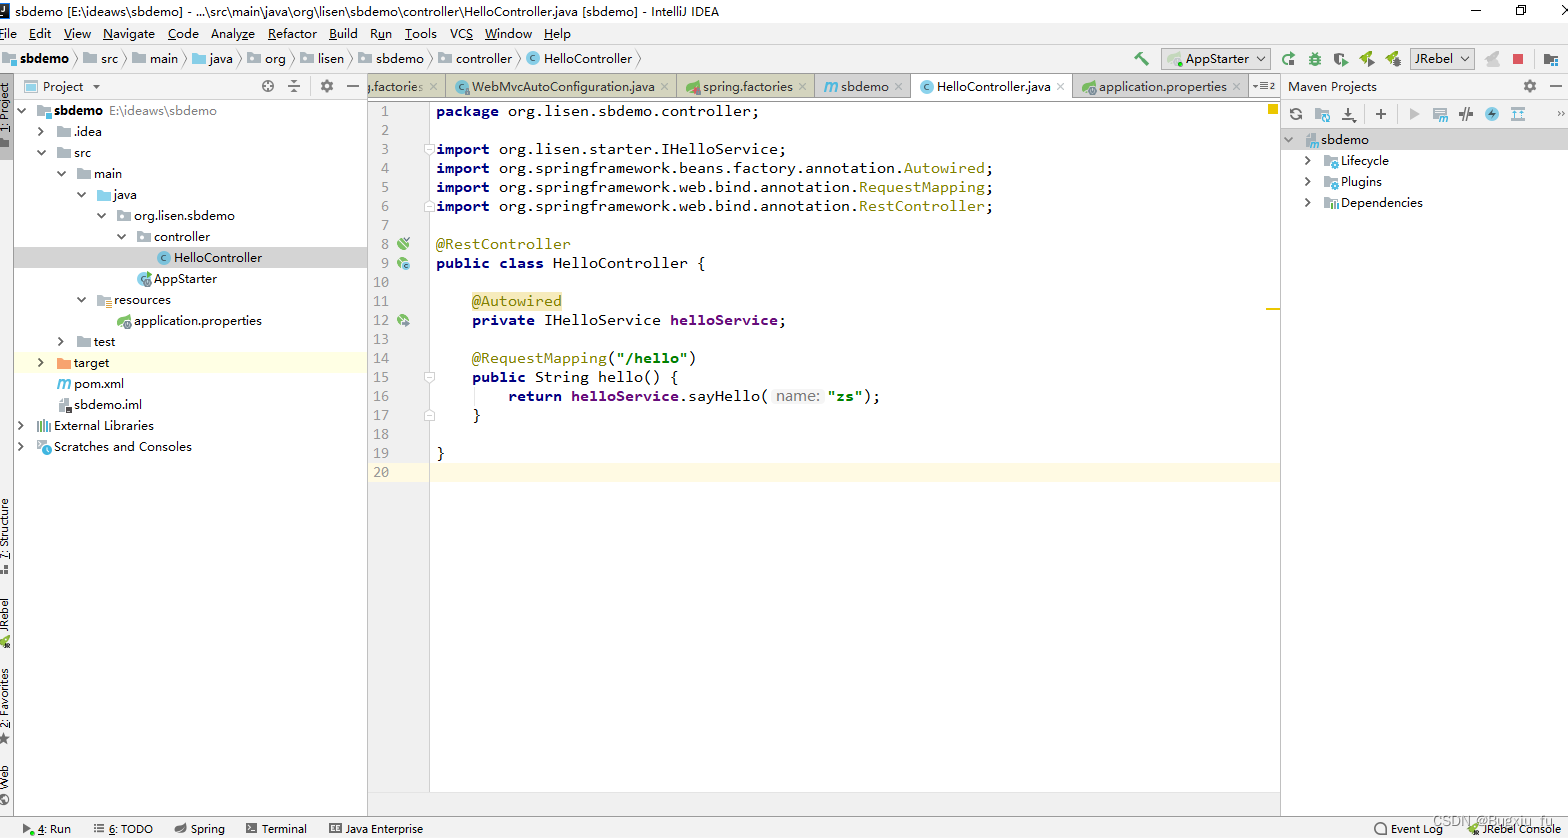
controller
@RestController
public class HelloController {

    @Autowired
    private IHelloService helloService;

    @RequestMapping("/hello")
    public String hello() {
        return helloService.sayHello("zs");
    }

}
最后启动服务,调用http://localhost:8080/hello,如果提示信息正常输出则说明运行成功。