Ubuntu下搭建vulhub靶机
前言
最近用Ubuntu21搭建vulhub,中途在搭建docker时遇到了报错,就记录下。回头看,发现官网安排的清清楚楚,哭了
一、更新源
因为速度原因,一般会使用国内的阿里云、清华云等
vim /etc/apt/source.list
deb http://mirrors.aliyun.com/ubuntu/ bionic main restricted universe multiverse
deb http://mirrors.aliyun.com/ubuntu/ bionic-security main restricted universe multiverse
deb http://mirrors.aliyun.com/ubuntu/ bionic-updates main restricted universe multiverse
deb http://mirrors.aliyun.com/ubuntu/ bionic-proposed main restricted universe multiverse
deb http://mirrors.aliyun.com/ubuntu/ bionic-backports main restricted universe multiverse
deb-src http://mirrors.aliyun.com/ubuntu/ bionic main restricted universe multiverse
deb-src http://mirrors.aliyun.com/ubuntu/ bionic-security main restricted universe multiverse
deb-src http://mirrors.aliyun.com/ubuntu/ bionic-updates main restricted universe multiverse
deb-src http://mirrors.aliyun.com/ubuntu/ bionic-proposed main restricted universe multiverse
deb-src http://mirrors.aliyun.com/ubuntu/ bionic-backports main restricted universe multiverse
二、安装vulhub
1.安装docker
#安装curl
apt install curl
#安装pip
apt install python3-pip
#安装docker
#原安装文档使用命令:curl -s https://get.docker.com/ | sh(可能因为网速问题一直报连接超时,试了多种方法都没有解决,最后用了下面 的命令)
apt-get install docker.io
检测是否安装成功:

#安装docker compose
pip install docker-compose
检测是否安装成功:

2.安装vulhub
#下载vulhub
wget https://github.com/vulhub/vulhub/archive/master.zip -O vulhub-master.zip
unzip vulhub-master.zip
cd vulhub-master
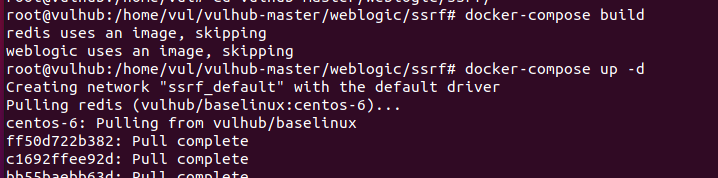
#验证是否可以成功启动
3.单独更新某个包
在对应文件夹下输入命令:
sudo wget http://************
版权声明:本文为qq_44504968原创文章,遵循 CC 4.0 BY-SA 版权协议,转载请附上原文出处链接和本声明。