springboot-starter自动装配
第一步新建springboot工程
删除resourses下的文件和启动类
在pom.xml中引入下面几个包
<!--引入spring-boot-starter:所有starter的基本配置
        这是Spring Boot的核心启动器,包含了自动配置、日志和YAML。-->
        <dependency>
            <groupId>org.springframework.boot</groupId>
            <artifactId>spring-boot-starter</artifactId>
        </dependency>

        <!-- Compile dependencies 自动配置的包 -->
        <dependency>
            <groupId>org.springframework.boot</groupId>
            <artifactId>spring-boot-autoconfigure</artifactId>
        </dependency>

        <!--spring默认使用yml中的配置,但有时候要用传统的xml或properties配置,
        就需要使用spring-boot-configuration-processor了-->
        <dependency>
            <groupId>org.springframework.boot</groupId>
            <artifactId>spring-boot-configuration-processor</artifactId>
            <optional>true</optional>
        </dependency>
2.编写加载配置文件的类
/**
 * @author lzj
 * @date 2021/10/26
 * 加载配置文件的类 能够在springboot的配置文件中定义相应的属性被找到
 * 下面能找到lzj.user.username = lisi
 * 便可以更改值
 */
@ConfigurationProperties(prefix = "lzj.user")
public class UserProperties {
    private String username = "张三";
    private int age = 15;

    public String getUsername() {
        return username;
    }

    public void setUsername(String username) {
        this.username = username;
    }

    public int getAge() {
        return age;
    }

    public void setAge(int age) {
        this.age = age;
    }
}
3.编写自动注入的类
@Component
public class UserServices {
    @Resource
    private UserProperties userProperties;
    public void say(){
        System.out.println(userProperties.getUsername()+" dsafas     age is" + userProperties.getAge());
    }
}
4.编写自动配置类
//声明配置类
@Configuration
//加载配置文件的类
@EnableConfigurationProperties({UserProperties.class})
//条件注解在有这个类的时候配置
@ConditionalOnClass(UserServices.class)
//条件注解 当lzj.user.enable=true时配置类生效
@ConditionalOnProperty(prefix = "lzj.user", value = "enable", matchIfMissing = true)
//需要继承InitializingBean接口为bean提供了初始化方法的方式
public class MystartAutoConfig implements InitializingBean {
    @Override
    public void afterPropertiesSet() throws Exception {
    }

    /**
     * 可以在里面配置你想自动装配的类
     * @return
     */
    @Bean
    @ConditionalOnMissingBean
    public UserServices getUserServices() {
        return new UserServices();
    }
}
5.在resouses下新建META-INF/spring.factories
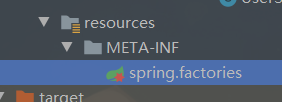
将我们写的自动配置类放到spring.factories文件中
springboot在初始化的时候会自动去扫这个文件,将文件中的类注入到容器中
org.springframework.boot.autoconfigure.EnableAutoConfiguration=\
com.jsu.lzj.spring.boot.autoconfigure.MystartAutoConfig
6.最后修改pom.xml打包安装到本地
build中留下面一个就够了

点击maven的install即可
打包好的jar包的使用时的目录

7.使用
在我们其它项目中就可以通过坐标引用了

8.更加规范的写法
像mybatis的starter一样
上面写的应该是直接自动配置的jar包
新建一个空的maven项目
只是用来管理jar包
只需要在pom.xml中引用我们的autoconfigure的jar包即可

版权声明:本文为xc979906570原创文章,遵循 CC 4.0 BY-SA 版权协议,转载请附上原文出处链接和本声明。